Category Archives: Gluten Free

No Bake Almond Joy Bars | Gluten Free + Paleo

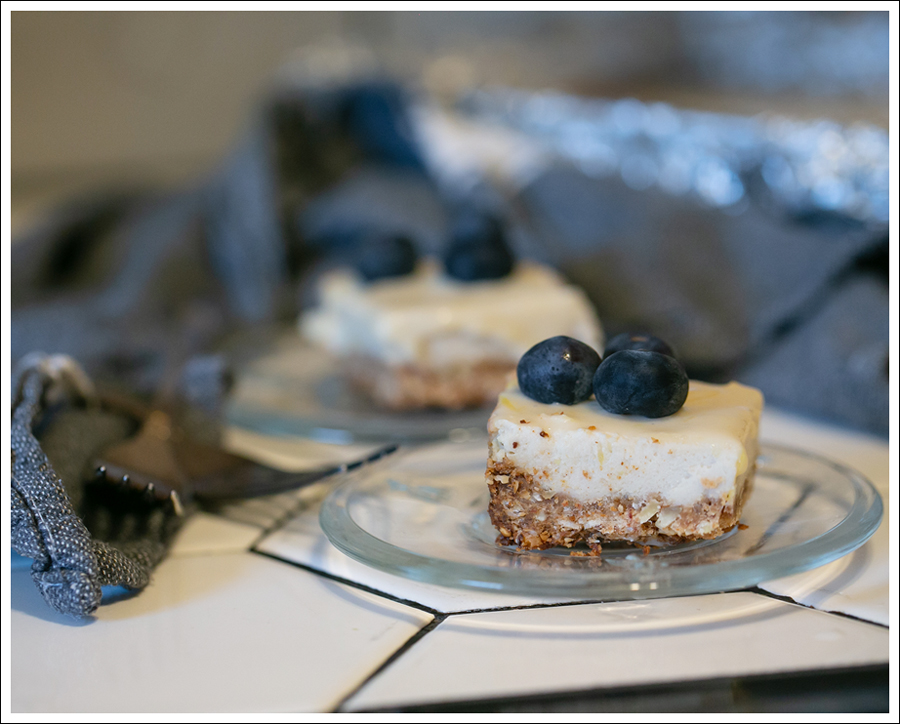
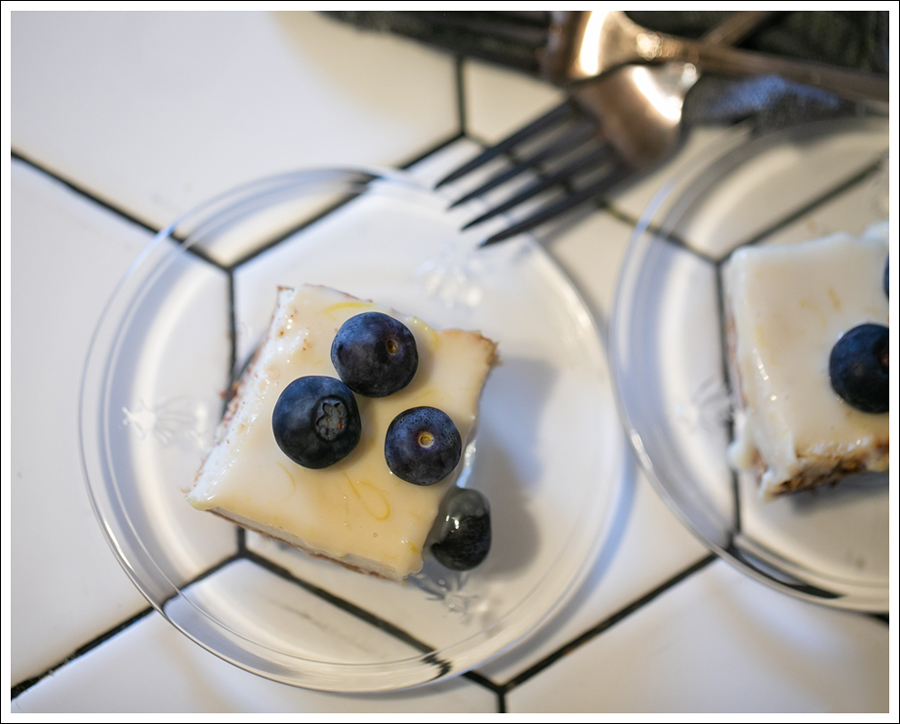
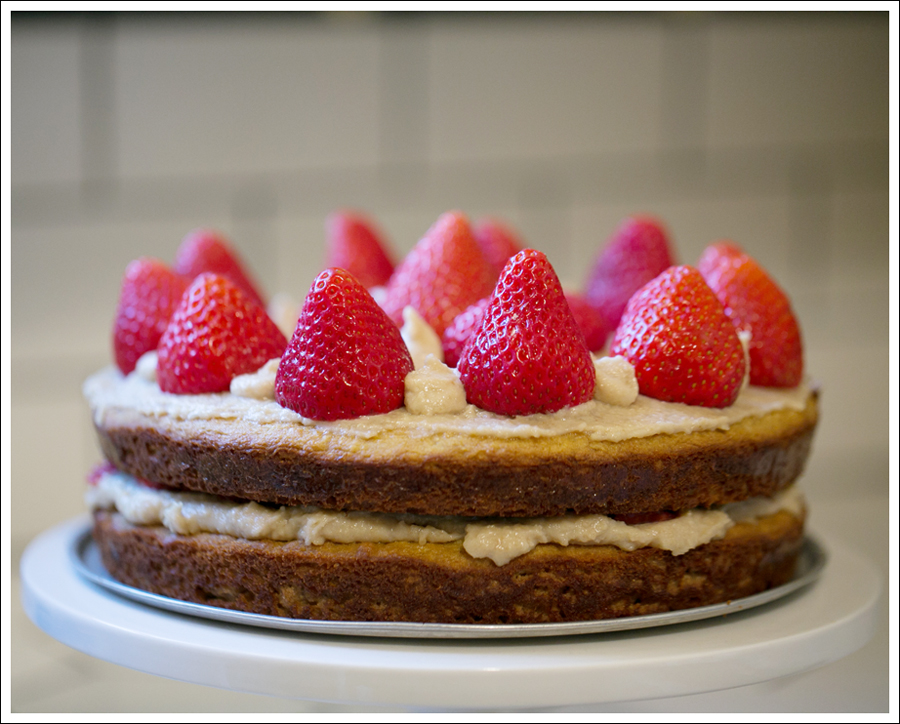
Ever since finding out that Maya can’t eat a LOT of foods, baking has become a lot harder…

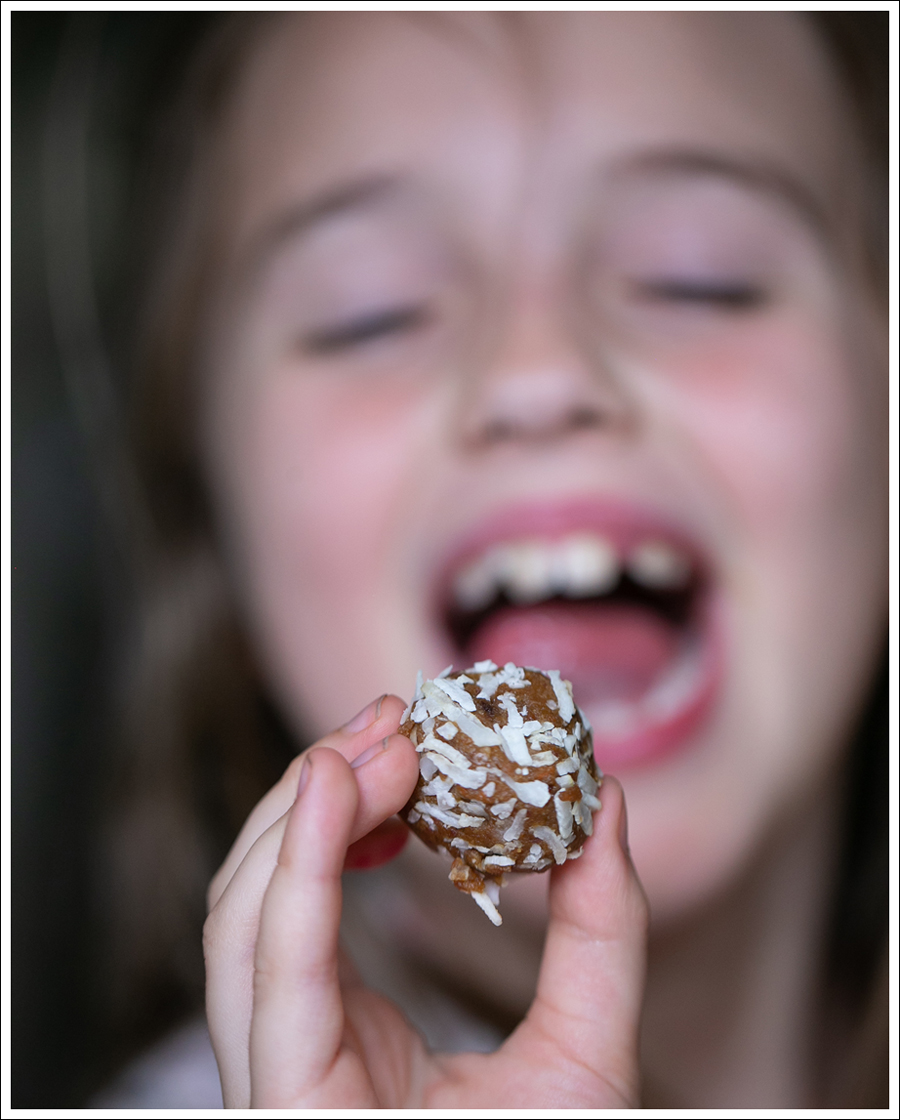
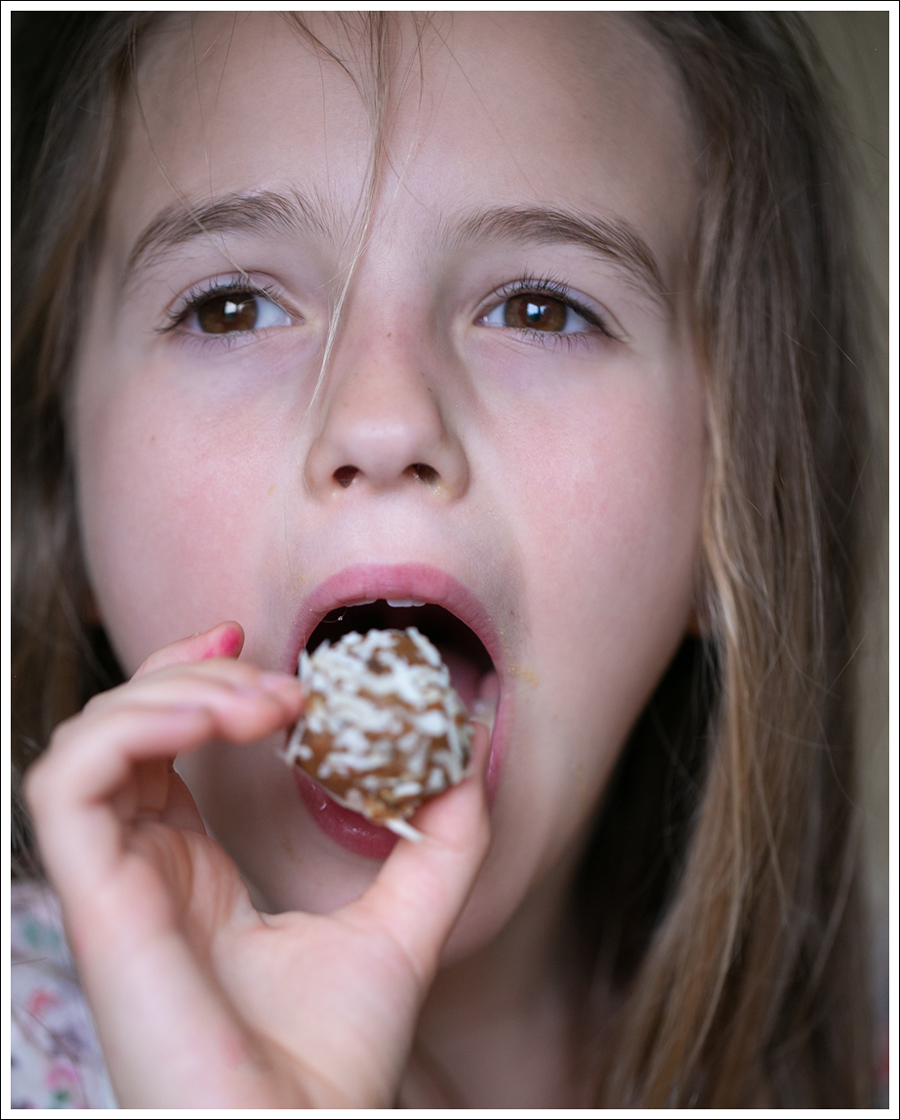
BUT!  My mom found this amazing Raw Almond Joy Bar recipe from Rawmazing , and it was a HIT with everyone!!

It’s SO hard to decipher recipes that LOOK good from bloggers, but…don’t really taste good.  THESE TASTE AMAZING!!

GREAT for the holidays for those that are allergy challenged…or for special occasions 🙂

Crust:

  1. Whisk all ingredients together and pour into oiled, parchment lined 8 x 8-inch glass pan. Set in refrigerator aside making topping. The bottom layer should be set up (but not completely hard) before adding the next layer.

Coconut Layer

  • 2 cups of dried, unsweetened, raw coconut
  • 2/3 cup coconut butter, softened
  • 3 tablespoons raw agave nectar (or liquid sweetener of choice)
  • 1-2 teaspoons organic almond flavoring (not raw)
  1. Place coconut in medium bowl.
  2. Whisk coconut butter (not the same as coconut oil), agave and almond flavor. Pour over coconut and mix well.

Topping

  • 1/3 cup almonds, coarsely chopped
  1.  Sprinkle these on top of the coconut layer

Ganache:

  • 1/2 cup raw cacao powder
  • 1/2 cup maple syrup
  • 1/4 cup coconut butter, softened
  1. Drizzle ganache over the top and refrigerate to set!

Enjoy!dit-elle-Lauren

Goi Ga | Vietnamese Salad with Chicken

The Huz and I went to Chicago last weekend, and had the most amazing time!  At some point, if I have time, I’ll do a blog post about what we did and where we ate.

One of the restaurants we went to was Le Colonial.  We got some of their Goi Ga, and it was perfection on a hot day!!!  I kept thinking about it for days afterwards, and was inspired to try and make something similar.

I got most of the ingredients at Trader Joe’s.  This isn’t an ad for them, just an fyi 🙂 . Minus the fish sauce…they recently discontinued it, so I went to another local store for that.  Good grief is it expensive?!!  It does make the dressing though…

The dressing typically has chili flakes in it, but I left that out for Maya’s sake.  I added plenty of hot sauce on mine though 🙂

Ingredients (feeds 4-6)

Dressing

  • 1/2 cup water
  • 1/4 cup fish sauce 
  • 1/4 cup rice vinegar
  • 2 Tablespoons freshly squeezed lime juice
  • 2 Tablespoons Raw Local Honey
  • 1 teaspoon minced garlic
  • 1 teaspoon crushed ginger
  • 1 teaspooon crushed lemongrass
  • You can add red chili flakes, but I left that out for Maya’s sake and added hot sauce after :))

I put all the ingredients in a mason jar and shook it up-done!

Salad

  • 9 oz bag of Trader Joe’s Organic Shredded Green & Red Cabbage with Shredded Carrots
  • 1 cup shredded carrots
  • 3/4’s of 10 oz bag of Trader Joe’s Cruciferous Crunch (Kale, Brussel Sprouts, Brocolli, and Cabbage.  (I was going to add the entire bag, but it was a bit much…)
  • 1.75 oz container of Trader Joe’s Organic Micro Greens
  • 1 rotisserie chicken shredded.
  • Optional diced peanuts (Maya is allergic, so I left these out.  If I’m being honest, I totally forgot haha.  I might add almonds next time!)

What to do

Combine all the salad ingredients, top with chicken, and salad dressing.  It’s best to let it sit for a few minutes and keep tossing it to make sure the dressing gets absorbed.

I topped mine with red chili garlic sauce and Sriracha, but it’s nice and refreshing all on it’s own!

Enjoy 🙂dit-elle-Lauren

Healthy Pad Thai | Peanut Free + Gluten Free

This is one of those recipes that I repeat A LOT!!  In it’s most basic form, I posted it here, but I mix it up all the time with what I add to it.  The sauce is just so good!!  And SO EASY!

Sadly, Maya can’t have peanuts or gluten anymore, so I made a few tweaks and made it work!  I sold it as a healthy Pad Thai, and even our 18 year old son had seconds!  Basically a gold medal on healthy cooking there!


Ingredients

For Sauce

    • 1/2 cup Almond Butter (use Sun Butter for Nut free or any nut butter if you don’t have any dietary restrictions!)
    • 3 tablespoons Rice Vinegar
    • 3 tablespoons Coconut Aminos (used in place of Soy Sauce)
    • 1 tablespoon Pure Maple Syrup (used in place of Brown Sugar)
    • 1 teaspoon grated fresh ginger (I cheat and use this)
    • 1 Cup Water

For the rest of the dish…

    • 1 medium onion diced
    • 2 Tablespoons of Olive Oil
    • 1 Tablespoon crushed garlic
    • 1 Teaspoon Ginger
    • 1 of each of a yellow, orange, and purple carrot (or really any veggie)
    • 8-10 Mushrooms diced
    • 2 blocks of Rice Noodles (or can use any noodle, quinoa, or skip it!)
    • 1 Rotisserie Chicken Shredded  (or you can cook chicken separately and shred)

Directions

  • Pull chicken off your rotisserie chicken and shred.  We always buy two chickens every week.  Eat one, then pull all the meat off both to use for another meal!
  • Add a couple Tablespoons of olive oil, ginger, and garlic to a large pan
  • Add diced onions, mushrooms, carrots, and sauté til soft (5-8 minutes)
  • Add back in shredded chicken

Make Sauce…

  • In a blender, combine 1 cup water with the whatever nut butter you choose, rice vinegar, coconut aminios, maple sugar, and ginger. Blend until smooth.

Cook noodles….

  • These particular noodles cook in less than 5 minutes!
  • Add the sauce and noodles to the pan, stir, and let sit for 2 minutes to soak in all the flavor of the sauce.
  • You could leave out the chicken for an amazing vegetarian Pad Thai!

Another healthy variation of this recipe here

  Enjoy!
dit-elle-Lauren

No Bake Carrot Sunbutter Coconut Energy Balls | Gluten Free * Nut Free * Dairy Free

Maya’s school recently had a “Healthy Snack” contest.  Truth be told…there wasn’t a lot of advanced notice on the specifics, but thankfully I volunteered in the class the day before it was due!  And…let’s be honest.  I probably wouldn’t have DONE anything until the day before, so…perfect timing!! haha.

The rules were that it had to be 5 ingredients or less.  Couldn’t use an oven or a microwave.  Needed to include ingredients, steps, AND…a picture!

Of COURSE we had to enter!! 😉

If I’m honest…I went through our archives to see if I could just reuse something haha-CHEATER!

BUT…nothing we had done so far fit all those, so…we (ok, I) winged it and made something up!

Maya suggested a smoothie, but…duh.  Who doesn’t think of that?!

Next was a banana concoction, but we were out of bananas, and on short notice…NO, not going to the store!

We have CARROTS!  And dates!  And…little energy balls are all over the place, so…yup.  We made our own version.  Could have been better, but honestly, I keep going back to all the things I would have added and think that maybe, simple is better?

In any case…we both loved them!  I asked her teacher if we could bring them in for the class, and she was excited!

I had to give Maya a pep talk about the fact that a lot of the kids might not like them, and to not get her feelings hurt.  Turns out, over half the kids loved them!  I even had 3 girls run up to me at drop off and ask if I could share the recipe with their moms so they could make them-MADE MY DAY!!!

Well….we found out that the recipe won!!!  For the entire school!  Fairly certain not a lot of people entered, but pretty cool regardless!

SO…go ahead and make these “Award Winning” energy balls!

HAHAHAHA. 

But seriously…do.  So easy and yummy!

Ingredients

  • 1 Cup Shredded Carrots
  • 1/2 Cup Unsweetened Sun Butter
  • 1/2 Cup Unsweetened Coconut (plus about another cup to roll the balls in)
  • 1/2 Cup Pitted Dates
  • 1/2 Cup Gluten Free Flour

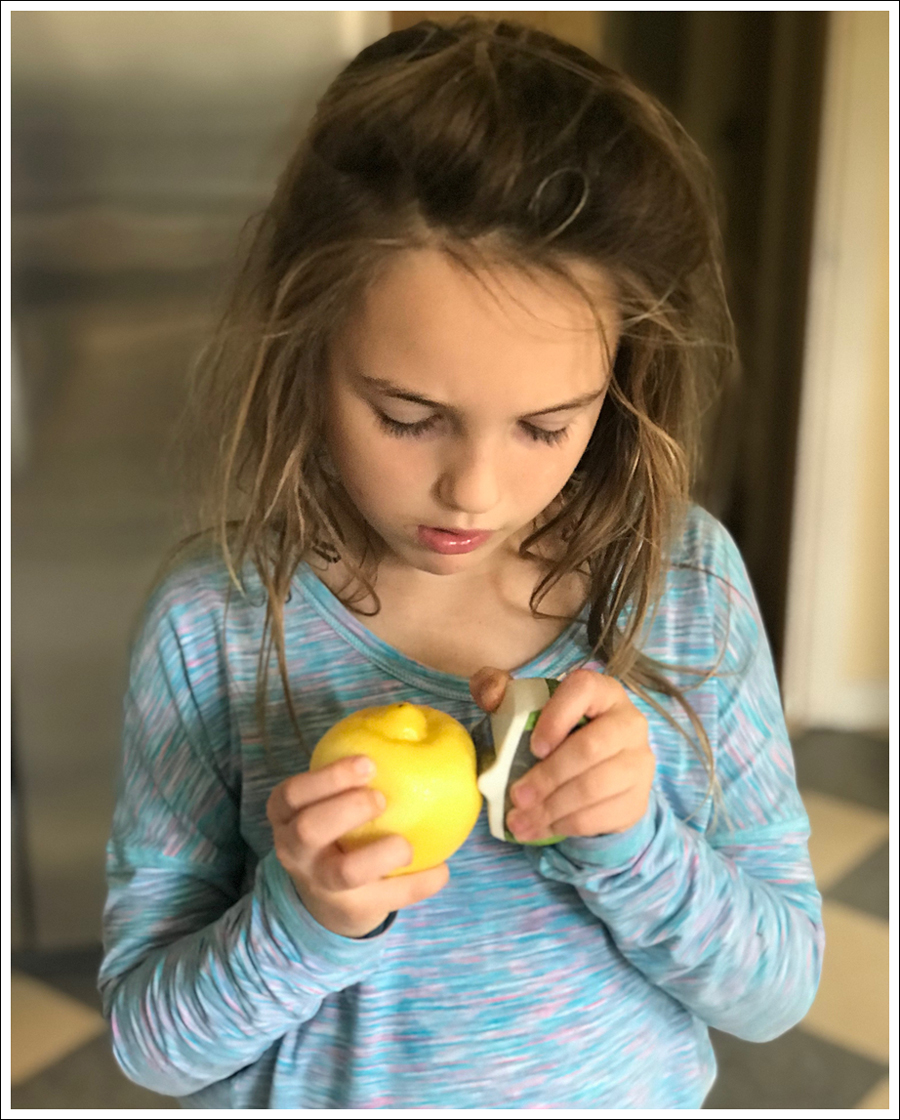
I did make sure she scrubbed her hands vigorously before she helped.  That pen didn’t want to come off… 🙂
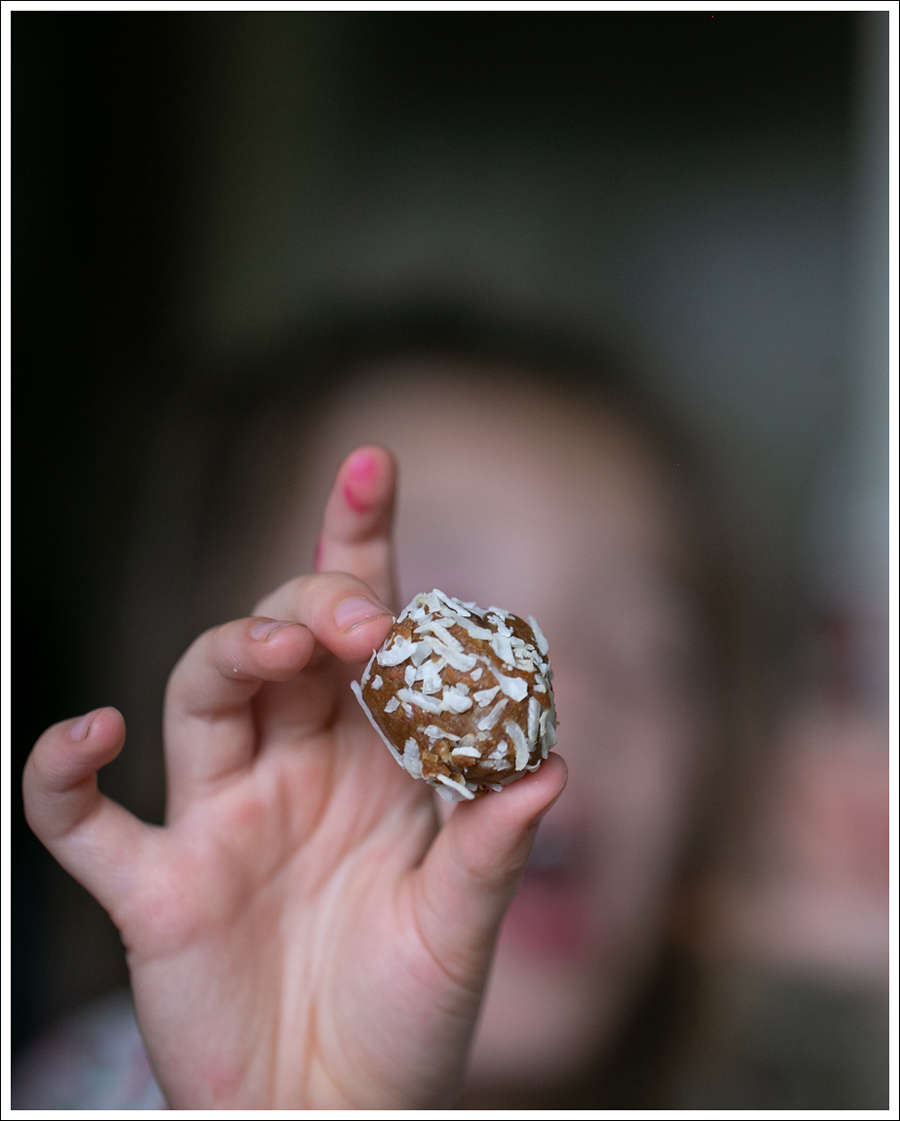
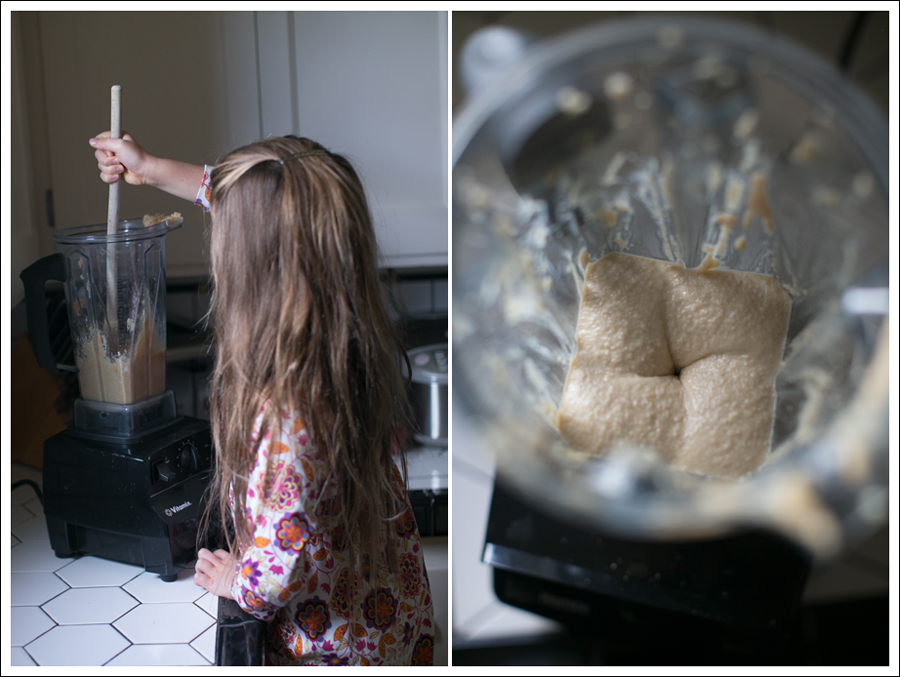
 I was so impressed.  She wrote out all the ingredients AND the instructions! ENJOY!

Lemon Bars with Lemon Curd Topping | Gluten Free + Dairy Free + Vegan

I’ve been dying to try a lemon bar recipe that Maya can have.  It’s pretty easy finding gluten free, but dairy and egg free are a little harder!

And then I found Minimalist Baker a few months ago on Instagram!

The minute I saw her Creamy Vegan Lemon Bars, I knew I wanted to try them!

I finally made the time yesterday for Easter, and they were so good!

I followed her recipe pretty much, with only a few exceptions, which I’ll note.

CRUST

  • 1 cup gluten-free oats
  • 1 cup almonds
  • 1/4 tsp sea salt
  • 4 pitted dates (original recipe called for 2 Tbsp coconut sugar, which I thought I had but didn’t.)
  • 1 Tbsp maple syrup
  • 4 Tbsp coconut oil (melted) (originally recipe said 4-5, but I went with the lesser due to the dates)

FILLING

  • 1 cup raw cashews
  • 1 cup coconut cream (the hardened portion at the top of full-fat coconut milk-I used the coconut cream from Trader Joe’s which is mostly cream)
  • 2 Tbsp arrowroot starch
  • 1/2 cup lemon juice
  • 1 heaping Tbsp lemon zest
  • 1 pinch sea salt
  • 1/4 cup maple syrup
  • 2 Tbsp organic powdered sugar (optional // for topping I didn’t use this)

Lemon Curd Topping

I had about 1/3 cup of coconut cream leftover in my can, so I decided to make a modified version of Minimalist Baker‘s Vegan Lemon Curd. The recipe called for a lot of the same ingredients I already had out, so it seemed like a no brainer.  AND…lemon curd on top of lemon bars?  YES, PLEASE!! .  Here’s how I modified to recipe, and the amount was perfect for a thin layer on top which I added right before serving.

  • 1/3 cup coconut cream
  • 1 tsp lemon zest
  • 1 Tbsp lemon juice
  • 1 tsp arrowroot starch
  • 1 Tbsp maple syrup

Instructions

  1. Add raw cashews to a mixing bowl and cover with boiling hot water. Let rest for 1 hour (uncovered). Then drain thoroughly.
  2. Preheat oven to 350 degrees and line an 8×8 inch baking dish with parchment paper (or tin foil).

  3. Add oats, almonds, sea salt, and dates to a high speed blender and mix on high until a fine meal is achieved.
  4. Transfer to a medium mixing bowl and add maple syrup and melted coconut oil, and add more oil if it’s too dry. Stir with a spoon to combine until a loose dough is formed.

    I accidentally did ALL this at the same time.  It didn’t blend as well, because the moisture made it clumpy… SO, if you see chunks of almonds in my crust that’s why!

  5. Transfer mixture to lined 8×8 pan and spread evenly.  I used my fingers to press the mixture down until it was evenly compacted.
  6. Bake for 15 minutes, then increase heat to 375 F and bake for 5 minutes more, or until the edges are golden brown and there is some browning on the surface. Remove from oven to cool slightly, then reduce oven heat to 350 degrees F (176 C).
  7. For the Filling… Once cashews are soaked and drained, add to a high speed blender with coconut cream, arrowroot starch, lemon juice, lemon zest, sea salt, and maple syrup. Mix on high until very creamy and smooth.
  8. Taste and adjust flavor as needed.
  9. Pour filling over the pre-baked crust and spread into an even layer. Tap on counter to remove any air bubbles.
  10. Bake for 20-23 minutes or until the edges look very slightly dry and the center appears “jiggly” but not liquidy.
  11. Let rest for 10 minutes, then transfer to refrigerator to let cool completely (uncovered) – at least 4 hours, preferably overnight.
  12. For the Lemon Curd…Place coconut cream and lemon zest in a small saucepan and whisk to combine.
  13. Add lemon juice and arrowroot starch to a small mixing bowl and whisk to thoroughly dissolve. Then add to coconut cream mixture and stir.
  14. Lastly, add maple syrup and whisk again until well combined.

  15. Place saucepan over medium heat and bring to a low bubble – not boil – whisking often. Once it starts bubbling and getting thick, reduce heat to medium-low and continue cooking until a visible ribbon forms when spooning a bit of the curd across the top. It should be thick and kind of jiggly in texture. During this process switch to a rubber spatula for stirring to ensure the curd isn’t sticking to the bottom or sides of the pan.
  16. Remove from heat and taste and adjust seasonings as needed, adding more lemon zest for acidity/brightness, or maple syrup for sweetness.
  17. Let rest for 15 minutes, then whisk once more and transfer to a glass bowl and cover with plastic wrap, making sure the plastic wrap touches the curd – otherwise a film may form (I didn’t do that and it was fine!).
  18. Refrigerate for 5-6 hours, or overnight, or until completely chilled and set.  I only let mine sit for 4 hours, and it was still great on top of the bars.
  19. To serve, spread the lemon curd over the bars, slice and top with fresh berries (optional)
  20. Store leftovers in the refrigerator, covered, up to 4 days, though best within the first 2 days.

ENJOY!!

I took this with my phone, as I didn’t have a lot of extra time to take pics while we were baking.  Super easy to let kids help you zest!  She also loved working our Vitamix!

Chicken Meatballs + Veggies (easy one pan meal!) Gluten free + Paleo + Whole30 + Costco Hack

Sooooo…. What do all kids like?  Never mind, what does everyone like?

MEATBALLS!

I frequently use meatballs to hide a ton of veggies in a meal, when I don’t really want to make a seperate salad.

We were down the teenage boy for this meal, so I went with a one pot meal with no extra carbs.Ingredients

  • 2 packages of Coleman Organic Chicken and Basil Meatballs
  • 1 White Onion
  • Olive Oil (or oil of choice) I just drizzle, but maybe 2 Tablespoons.
  • 1 teaspoon grated fresh ginger (I cheat and use this)
  • 1 teaspoon crushed garlic (I use this, but woah…go to the store! It’s a fraction of the cost)
  • 8 Organic Bella Mushrooms
  • 3 organic Rainbow Carrots (regular are just as good-not as pretty though ;))
  • 1 Jar of Pasta Sauce
  • 4-5 handfuls of Power Green Mix which is spinach, baby chard, and kale)

Directions

  • Use a pretty large non stick pan, and add in the garlic, ginger, and oil of choise
  • Dice up the onion and add it in.
  • While the onion is sauteing dice up your other veggies.  I honestly just use whatever I have on hand.  I’ve subbed in various sweet peppers or even broccoli.  Add whatever you have in.
  • Once they are almost al dente add in your meatballs.  I like to get them cooking with the veggies to impart their flavor a little bit.
  • Once everything is almost ready, add in the hand fulls of greens.  It doesn’t have to be mixed.  Just spinach would be good!  If it’s all kale, I would add it in sooner due to the toughness of kale.
  • Top it all off with a jar of your fav spaghetti sauce and your good!
  • Frequently I’ll add in these gluten free noodles (can be bought in smaller quantities at Thrive Market or in bulk at Costco.  We LOVE them not only for their flavor but QUICKNESS to cook!) . Or you could easily add zoodles to keep it dietary compliant!

None of this is sponsored.  We just live by the easy shopping of Costco, Trader Joe’s, and Thrive Market.  And are happy to share the easy cooking to be had from there!

Enjoy!dit-elle-Lauren

Chia Pudding with Blueberries + Rasperries + Almonds

“Brilliant Breakfasts”

How many of your girls read #FancyNancy?  Maya is a big fan, so when I saw @redtricycle was doing a @disneyjunior Photo Challenge, I thought it would be the perfect thing for Maya and I to do together!
No, this isn’t an ad.  Yes, it was somewhat staged.  But also yes, we had fun!  AND…ate some yummy chia pudding.
That’s where the “brilliant” comes in!  #ChiaSeeds are an excellent source of omega-3 fatty acids, rich in antioxidants, and they provide fiber, iron, and calcium.

Omega-3 fatty acids help raise HDL cholesterol, the “good” cholesterol that protects against heart attack and stroke.

#RTDisneyFancyNancy

Ingredients

  • 1/3 cup chia seeds (or more depending on how many people you want to feed-this would make about four to five 1/2 cup servings)
  • 2 Cups unsweetened Vanilla Almond Milk (or whatever milk you want to use)
  • 1 Tablespoon raw honey or agave, plus a little additional for drizzling.
  • Handful of Blueberries, raspberries, and almonds.

Directions

  • Mix, chia seeds and Honey/Agave in with the milk and let it sit overnight, or do it first thing in the morning, if you want to have it for dessert.  It will plump up, and ends up looking like tapioca pudding.
  • Scoop out into bowls.  Top with berries, almonds and drizzle a little more honey over the top.

Enjoy!

dit-elle-Lauren

Bone Broth Rotisserie Chicken Ramen Soup with Soft Boiled Egg || Crockpot | Gluten Free

We had two gorgeous days this week, and then…back to rain and cold.

We cannot seem to shake the illnesses over here, so I’m still cranking out the bone broth soups!

LOVED this one!!

This recipe can be varied in so many ways, but…here’s what I did!

I buy two rotisserie chickens each week.  One we eat as a meal, and then I use both carcasses, for the bone broth.  The other chicken goes back into the soup I make!

Ingredients (feeds 4 with leftovers)

  • Two Rotisserie Chickens (Use both carcasses for the bone broth but the shredded chicken from both can be used for multiple meals!)
  • 4-6 Medium sized carrots (I used usually use organic Rainbow Carrots, because… FUN COLORS! 🙂 but didn’t have them this time.  I highly recommend them though :))
  • 1 Tablespoon crushed ginger
  • 1 Teaspoon crushed garlic
  • 1 Medium to Large Onion Diced
  • Sea Salt and Pepper to taste
  • Soft boiled egg (boil for 7 minutes and then immediately put into ice cold water)
  • Avocado and any other veggies to top for crunch.  I added tomatoes, but shredded carrots or sprouts would be yummy too!
  • Ramen Noodles (I used these) . Or you could do zoodles or sweet potato “noodles” for Whole 30!

Directions

  • Pick off all the chicken from the bone and set aside in an airtight container.
  • It’s not necessary, but I found these bags and I put all my bones in them.  No need to pick out bones and you get to keep all the yummy onions and carrots  Very crude Video HERE haha.
  • Place the carcass in the slowcooker with the carrots, onions, garlic, and ginger.
  • Pour 10-12 Cups of Water depending on your crockpot.  I filled mine until 1″ of the top.
  • Cook on low overnight for 12-18 hours.  Honestly…longer the better.
  • The next morning, pull on the bones out unless you bought the bags!!.  I left the carrots and onions in there, and for me…it’s a must for flavor!  They were mushy, but I figured the flavor would still be good and it SO was!
  • Add in ramen noodles and let them sit for a few minutes or all day.
  • Add shredded chicken back in and let sit on warm until dinner.
  • Top with soft boiled egg and any other condiments.

For other recipes…

For beginners that haven’t tried making bone broth before….I hadn’t either.  So…here’s (with adjustments added!  My first attempt here, and my 2nd version with sweet “potato noodles”.

And, other easy Crockpot Recipes you might enjoy…

Thai Coconut Chicken Soup

Healthy Chicken and Dumplings

Crockpot Veggie Pasta and Turkey Meat Sauce

Most importantly…

Enjoy!!

And let me know if you have!dit-elle-Lauren

Bone Broth Rotisserie Chicken Sweet Potato “Noodle” Soup || Crockpot | Whole30 | Gluten Free

I’m officially obsessed with making bone broth soups!!

Admittedly so much so that the Huz said….”Ok, I might need a soup break.”

haha.  Whoops.

Yet…are you kidding me?  SOUP break when it’s FREEZING outside and everyone is getting sick??!!

NO!!

I changed my original attempt at making this, because one chicken carcass didn’t seem to wield enough flavor-mostly because I don’t like adding a litany of seasonings!.  Also, my original attempt used regular noodles, so don’t despair, if you want a hearty DELICIOUS recipe, that is not Whole30…it would be delicious with any kind of noodles!  And would be even more so with the two carcass addition!

Admittedly, I didn’t soak mine for days… as it probably should have if you are only using one carcas.

I’m more of an overnight for the next meal kinda person.  SO…if you’re with me on that, and want even MORE left overs…

TWO CHICKENS!

Otherwise…one chicken carcass for longer 15-18 hours is what I read.

SO…I’m now converted to buying two chickens!  We eat one meal from the actual chicken, and then I take all the meat off both for later use (more recipes on that to come!) but most of one chicken goes back into the soup.

Ingredients (feeds 4 with leftovers)

  • Two Rotisserie Chickens (Use both carcasses for the bone broth but the shredded chicken from both can be used for multiple meals!)
  • 4-6 Medium sized carrots (I used organic Rainbow Carrots, because… FUN COLORS! :))
  • 1 Tablespoon crushed ginger
  • 1 Teaspoon crushed garlic
  • 1 Medium to Large Onion Diced
  • Sea Salt and Pepper to taste
  • 1 Sweet potato spiralized to make “noodles” . Could also do any veggie or use any other kind of noodle!  I cannot even tell you how easy it is to do this! Less than 2 minutes.

Directions

  • Pick off all the chicken from the bone and set aside in an airtight container.
  • GUYS!!!  Editing to add.  I did NOT do this for this recipe, but later found these bags and I put all my bones in them, then lifted it all out!  DONE!  Very crude Video HERE haha.
  • Place the carcass in the slowcooker with the carrots, onions, garlic, and ginger.
  • Pour 10-12 Cups of Water depending on your crockpot.  I filled mine until 1″ of the top (Ok, I filled it to closer to the top my next time, and…it didn’t go well for the cleaning up aspect…fyi :)) . SO…keep it within an inch of the top 🙂
  • Cook on low overnight for 12-18 hours.  Honestly…longer the better.
  • The next morning, pull on the bones out unless you bought these bags!!.  I left the carrots and onions in there, and for me…it’s a must for flavor!  They were mushy, but I figured the flavor would still be good and it SO was!
  • Meanwhile…spiralize your sweet potato.  You have plenty of time, so no rush on doing it 🙂
  • When the bones are all out (pick them out or lift them out in a bag!), place the spiralized sweet potatos back in and cook on high for another hour.
  • Add shredded chicken back in and let sit on warm until dinner!Great for those sick days….or NOT, because….YUM!!
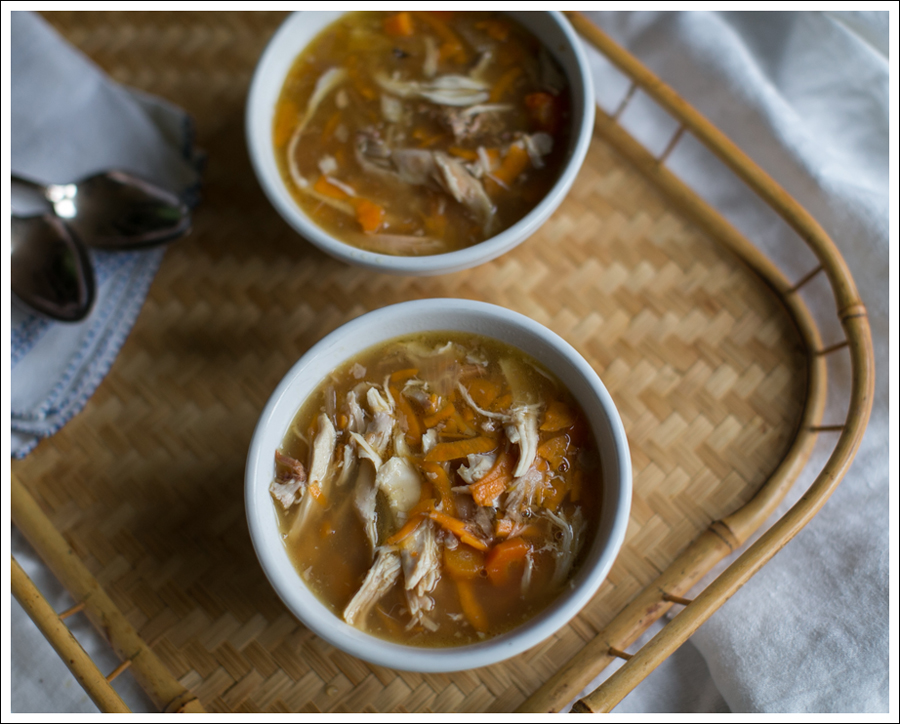
For other recipes…

For beginners that haven’t tried making bone broth before….I hadn’t either.  So…here’s (with adjustments added!  my first attempt!

You can see Esther’s chicken soup post where she started from scratch with a whole chicken.

And, other easy Crockpot Recipes you might enjoy…

Thai Coconut Chicken Soup

Healthy Chicken and Dumplings

Crockpot Veggie Pasta and Turkey Meat Sauce

Most importantly…

Enjoy!!

And let me know if you have!dit-elle-Lauren

Vanilla Cake with Cashew Frosting and Strawberries | Paleo

I made this for Maya’s birthday, which was back in…..

OCTOBER!

Sigh…

Poor thing’s birthday is right in the midst of my busiest time at work!  She still got the cake she requested, but I never had time to blog it!

I used Paleo Grubs “Famous Vanilla Cake” and only made a few changes.  Everyone LOVED it, and no guilt either!

Ingredients

For the cake
  • 4 eggs
  • 4 tbsp raw honey
  • 5 tbsp coconut flour
  • 5 tbsp almond flour
  • 1/2 tsp baking powder
  • 1/8 tsp salt
  • 1/4 tsp vanilla extract or seeds from one vanilla pod
For the filling
  • 1 3/4 cups raw cashews, soaked for at least 4 hour and drained well
  • ¼ cup coconut oil, melted
  • 1/3 cup honey
  • about 1/3 cup water
  • ½ tsp lemon juice
  • seeds from one vanilla pod
  • ⅛ tsp sea salt

Directions for Frosting

  • Original recipe says to make the filling a day ahead.  I made mine the day of, but made it first and chilled it while I was making the cake.
  • Place all the ingredients except water in a high power blender and blend until smooth. Add the water, a tablespoon at the time until the filling become silky and you get your desired texture.
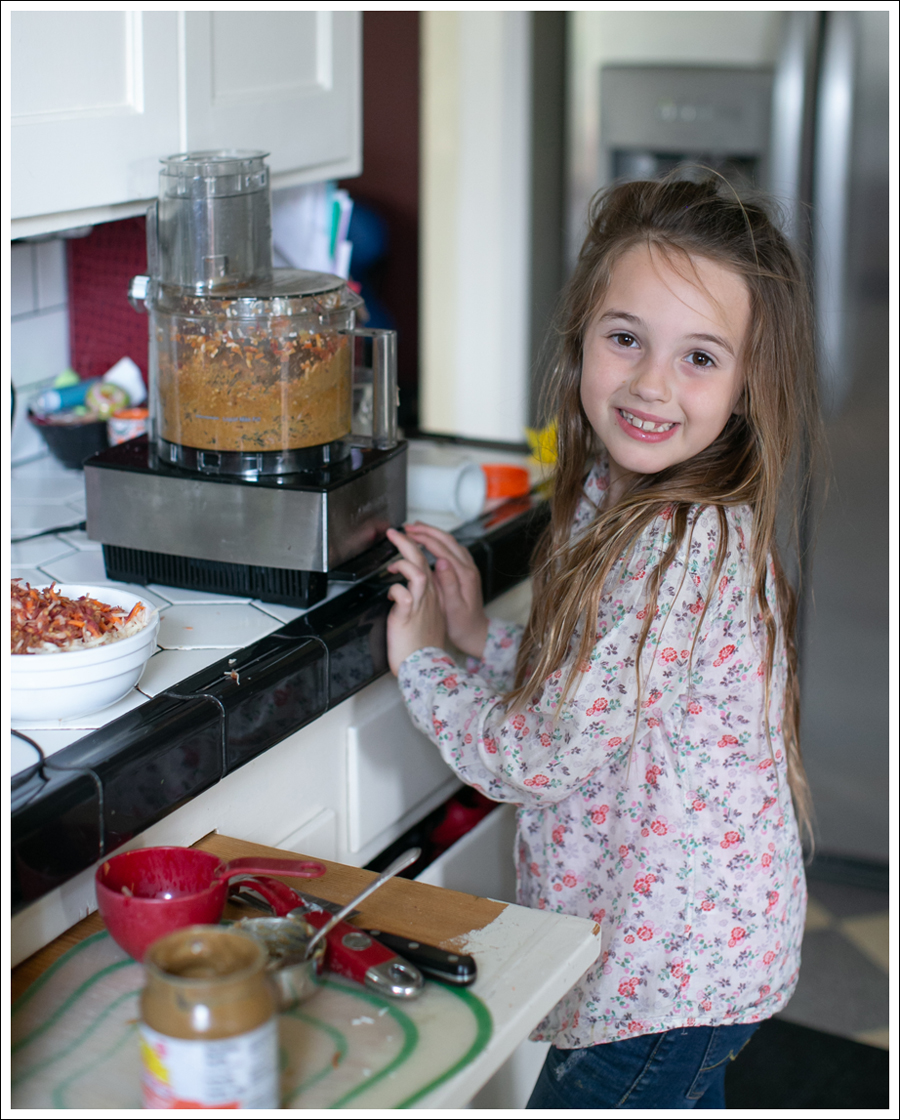
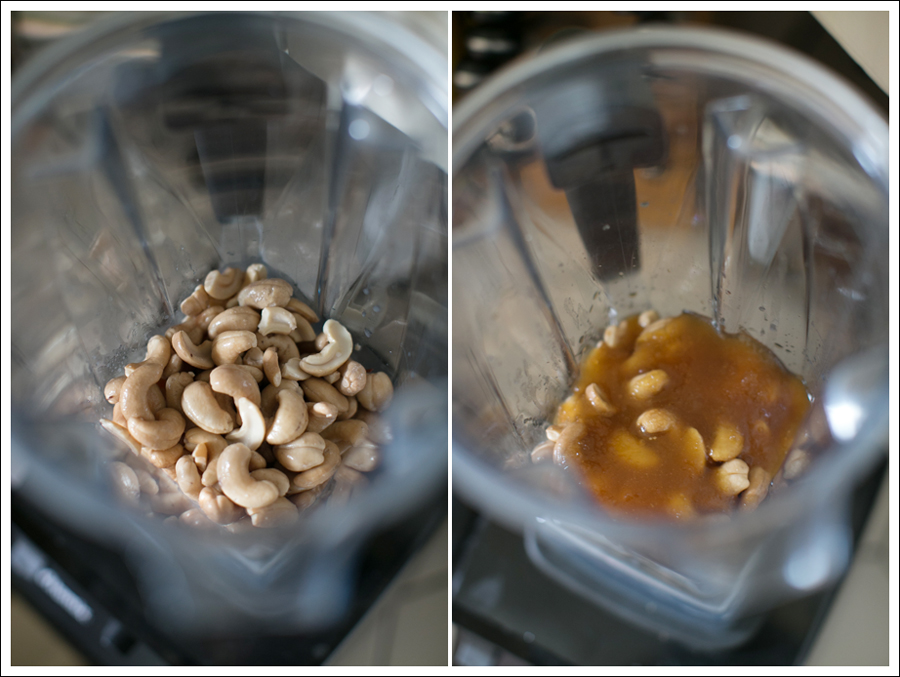
Having a cute assistant adds even more sweetness 😉 . Ok, that was bad…but true! 🙂
  • Transfer the filling to a bowl, cover with plastic wrap and chill overnight or for a few hours like I did 🙂

Directions for the cake

  • Preheat oven to 350.
  • Original recipe says to line two 8 inch spring-form pans with parchment paper, but I just greased two 8 inch cake pans really well and they popped right out.
  • In a large bowl or food processor cream the eggs with honey.
  • In a separate bowl combine flours with salt and baking soda.
  • Add the dry mixture into the wet mixture and add vanilla extract or seeds from vanilla pod.
  • Divide the mixture between prepared pans and bake for 15-20 minutes or until a toothpick comes out clean when inserted.

For visual reference.  The dough will be more dense. 
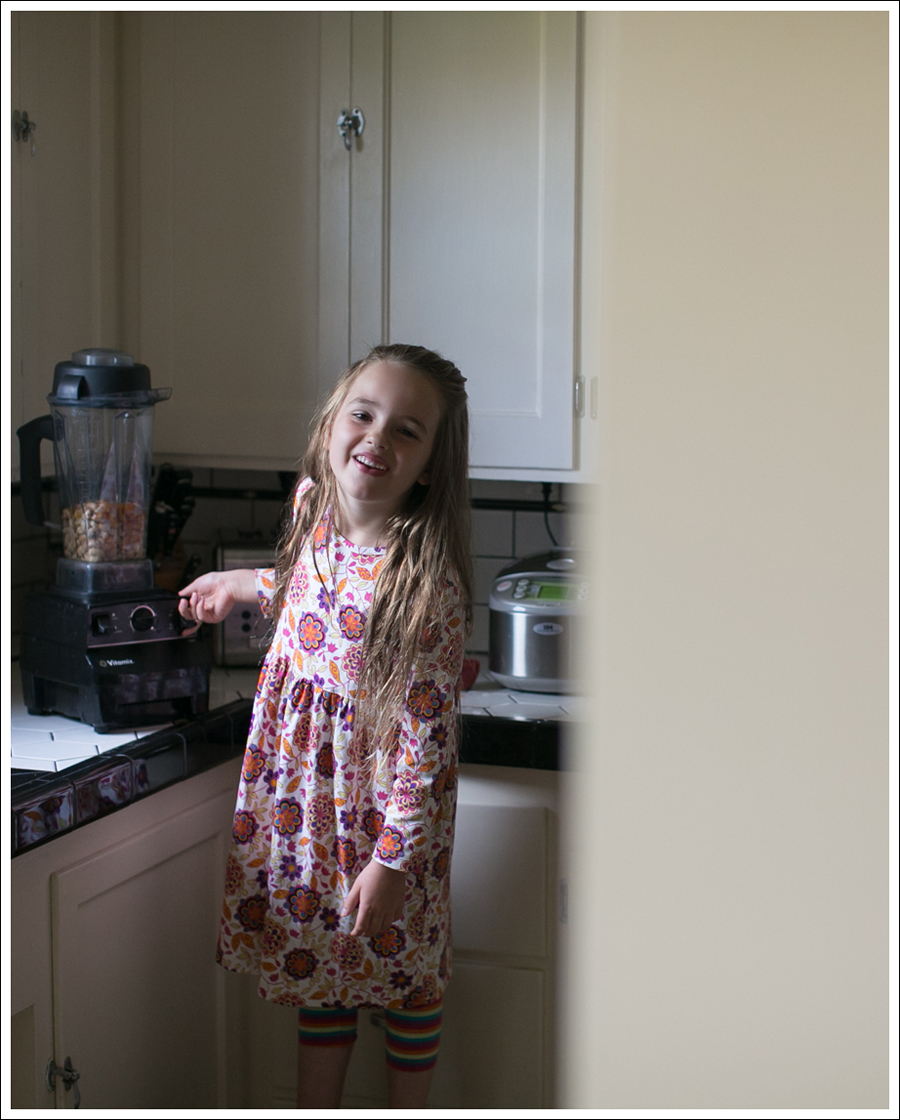
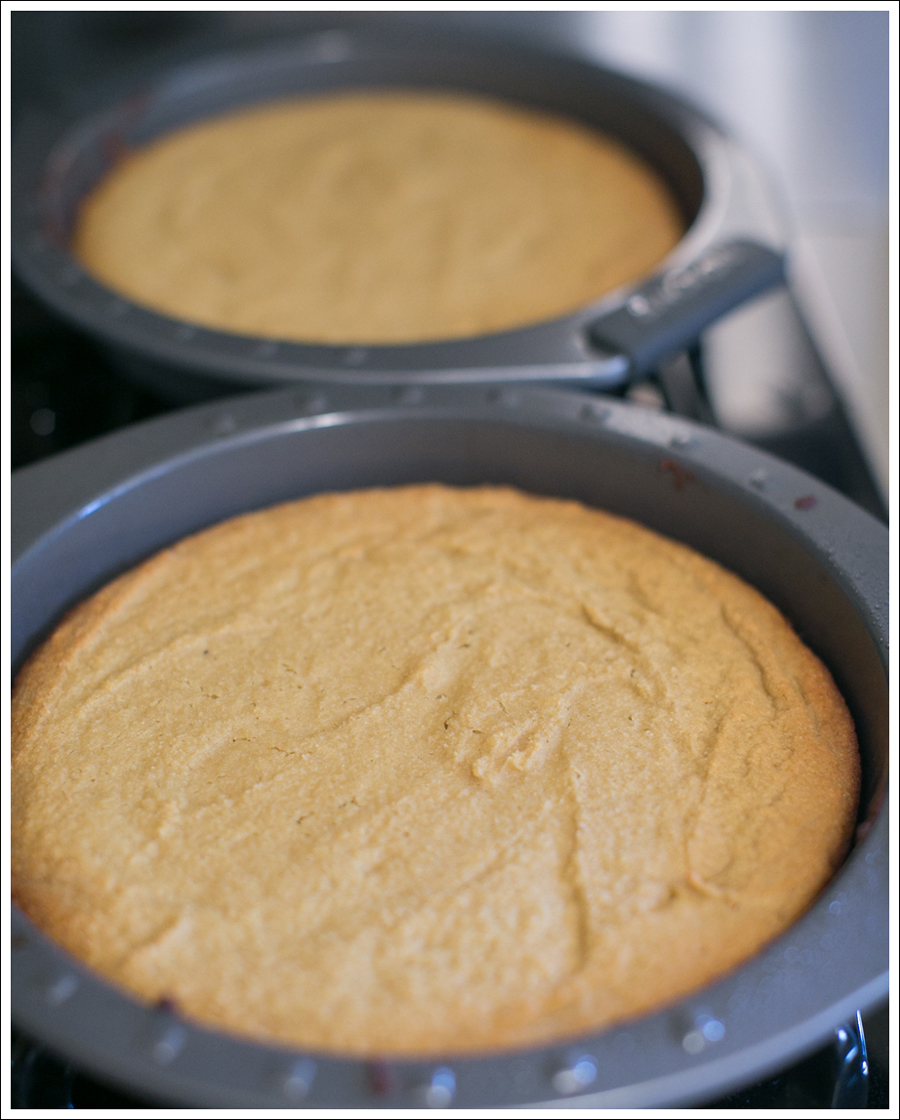
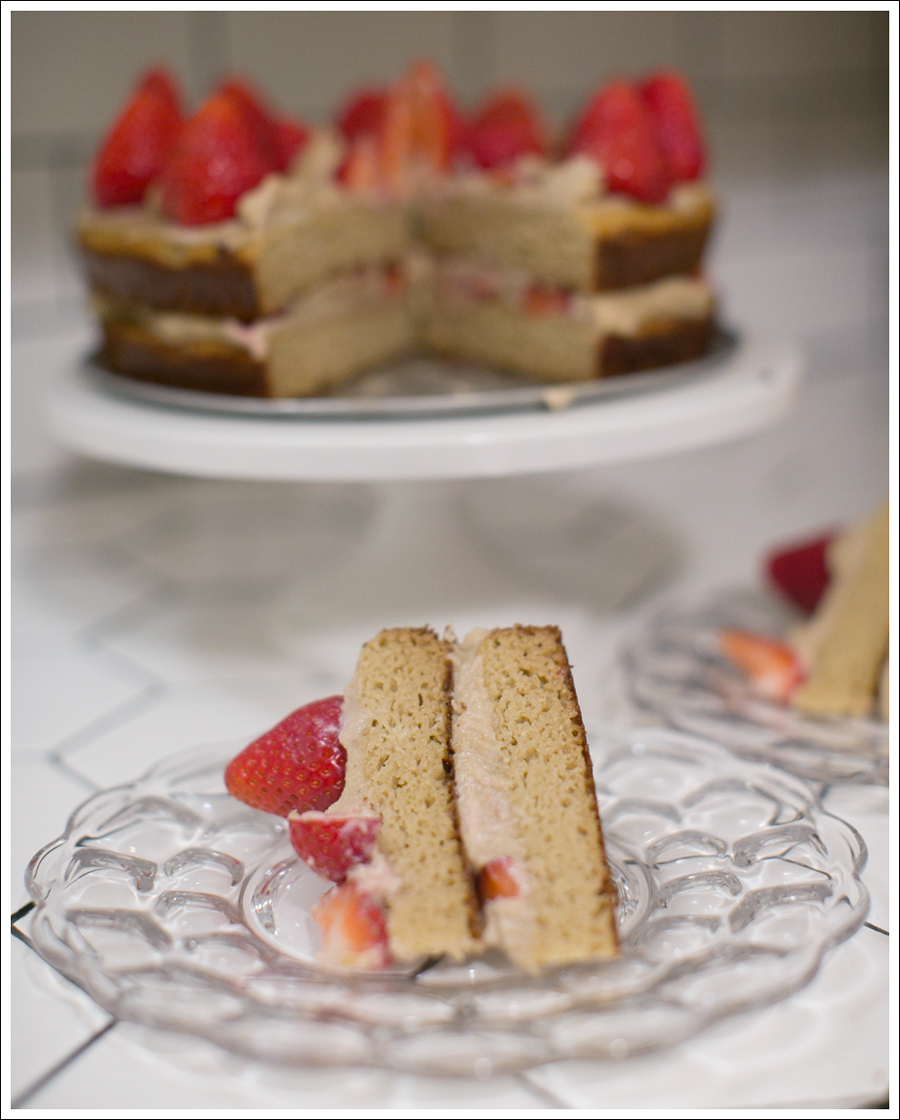
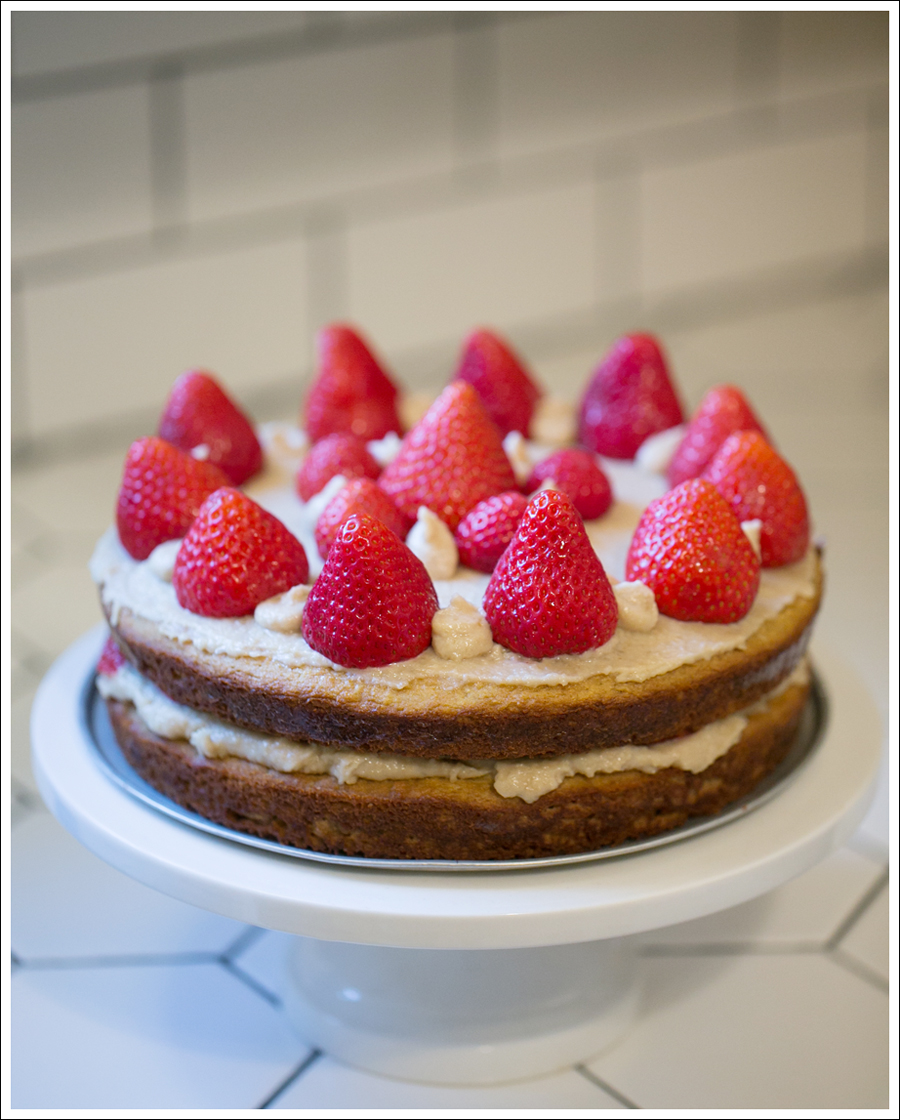
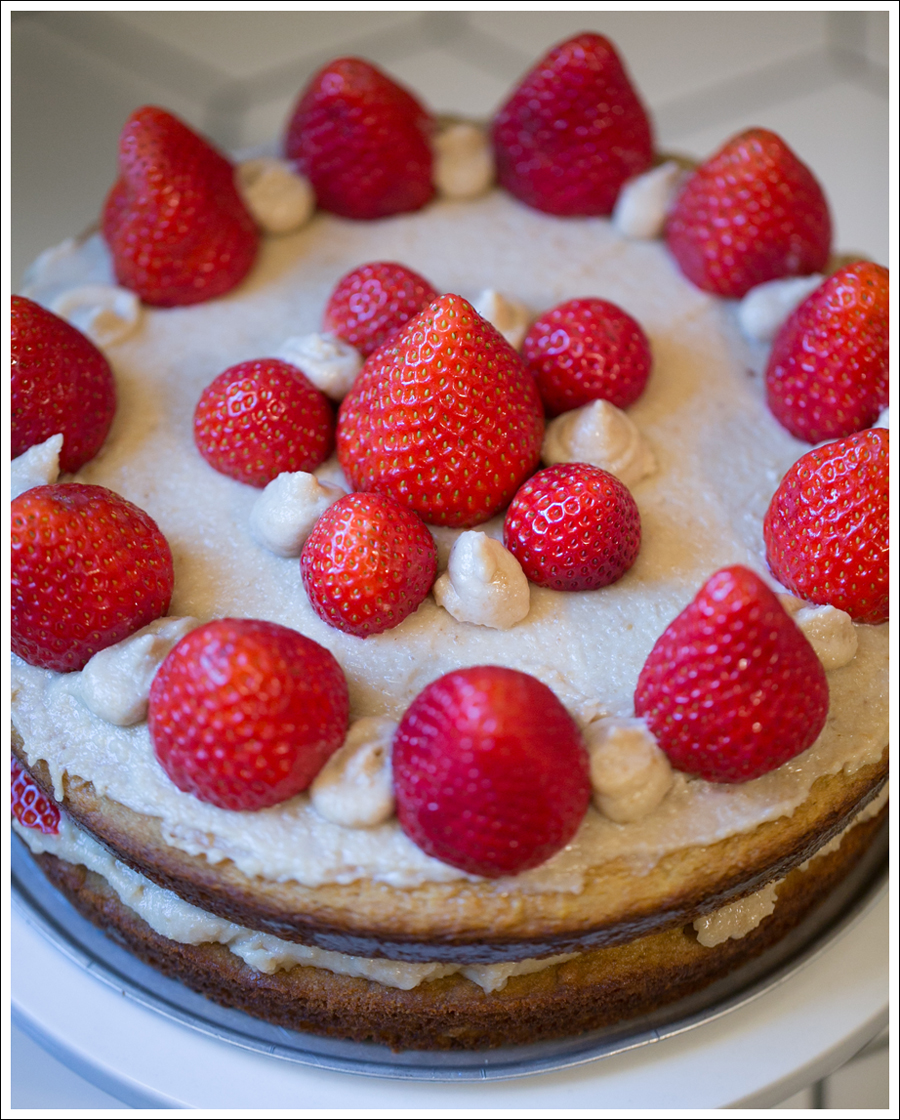
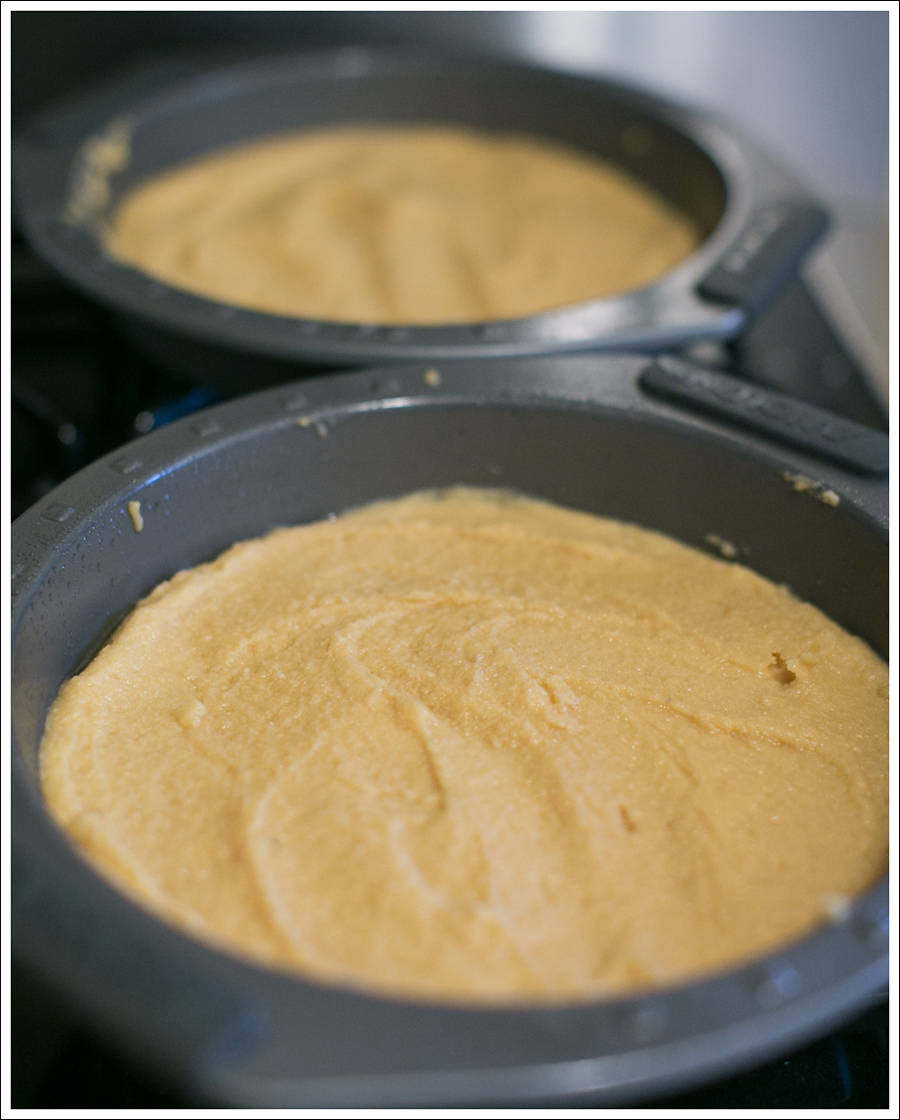
And it won’t rise much after cooking.

  • Remove cakes from the oven and set aside to cool completely.
  • After the cake is cooled off, smooth half of the frosting on top of one cake layer, and layer sliced strawberries.
  • Place 2nd layer on top and spread a thin layer of the frosting on top and place strawberries with the top cut off around the cake.
  • Scoop the rest into pastry bag or you can use a ziploc bag with the tip cut off.  Squeeze onto cake for decoration!

ENJOY!dit-elle-Lauren