Tag Archives: gluten free

Ground Turkey and Veggie Stuffed Sweet Potato with Avocado // Paleo // Whole30 // Gluten Free

I actually took these pictures the next day as I had the leftovers for my lunch.

Dare I say that it was even better the next day?!

Isn’t that the case with a lot of dishes?  The flavors just need to settle into each other sometimes.  One of the many reasons I always make extra!

Ingredients

  • 2 Tablespoons Extra Virgin Olive Oil
  • 1 Teaspoon crushed garlic (I cheat and use Trader Joe’s pre crushed :))
  • 1 Teaspoon Crushed Ginger
  • 1 white onion
  • 2 Cups shredded Carrots
  • 2 Cups Diced Mushrooms
  • 2 lbs ground turkey (I like to make a lot so we have leftovers :))
  • Avocado for garnish.  Not necessary, but the creaminess of the avocado was so good with the savoriness of the dish.  Plus…avocado on everything, I say!
  • Jar of your favorite pasta sauce.
  • 2-4 large sweet potatoes.  We all each had just half, but if you only have small sweet potatoes, or love them…do more!

Directions

Start your sweet potatoes ahead of time!!  I’ve tried numerous times, and they ALWAYS take longer than they are supposed to!  This might be the ONE thing that pushes me over the edge to finally try my Instapot….that has been sitting there unused for the last two years, because I’m scared of it haha.  BUT…

  • Place sweet potatoes on a baking sheet or a baking pan, pierce with a fork and bake for an hour, or until the inside is soft.  It took my ginormous ones an hour and 15, so fair warning if you are on a time schedule for dinner!! 😦
  • Dice up onion while your potatoes are cooking…you’ll have plenty of time 😉
  • Sautee 2 Tablespoons of Extra Virgin Olive Oil with garlic, ginger, and onions for about 5 minutes.
  • Add in ground turkey (or any ground meat!)
  • Add in diced mushrooms
  • Add in shredded carrots
  • Either add Trader Joe’s “Everyday Seasoning” or…add all the things…I’m lazy.
  • Add in your pasta sauce.
  • When potatoes are done, take them out, cut in half if big, or slice down the center if small or medium.  Crush it up a little.
  • Spoon on meat and veggie mixture, and top with avocado!

Enjoy!dit-elle-Lauren

No Bake Carrot Sunbutter Coconut Energy Balls | Gluten Free * Nut Free * Dairy Free

Maya’s school recently had a “Healthy Snack” contest.  Truth be told…there wasn’t a lot of advanced notice on the specifics, but thankfully I volunteered in the class the day before it was due!  And…let’s be honest.  I probably wouldn’t have DONE anything until the day before, so…perfect timing!! haha.

The rules were that it had to be 5 ingredients or less.  Couldn’t use an oven or a microwave.  Needed to include ingredients, steps, AND…a picture!

Of COURSE we had to enter!! 😉

If I’m honest…I went through our archives to see if I could just reuse something haha-CHEATER!

BUT…nothing we had done so far fit all those, so…we (ok, I) winged it and made something up!

Maya suggested a smoothie, but…duh.  Who doesn’t think of that?!

Next was a banana concoction, but we were out of bananas, and on short notice…NO, not going to the store!

We have CARROTS!  And dates!  And…little energy balls are all over the place, so…yup.  We made our own version.  Could have been better, but honestly, I keep going back to all the things I would have added and think that maybe, simple is better?

In any case…we both loved them!  I asked her teacher if we could bring them in for the class, and she was excited!

I had to give Maya a pep talk about the fact that a lot of the kids might not like them, and to not get her feelings hurt.  Turns out, over half the kids loved them!  I even had 3 girls run up to me at drop off and ask if I could share the recipe with their moms so they could make them-MADE MY DAY!!!

Well….we found out that the recipe won!!!  For the entire school!  Fairly certain not a lot of people entered, but pretty cool regardless!

SO…go ahead and make these “Award Winning” energy balls!

HAHAHAHA. 

But seriously…do.  So easy and yummy!

Ingredients

  • 1 Cup Shredded Carrots
  • 1/2 Cup Unsweetened Sun Butter
  • 1/2 Cup Unsweetened Coconut (plus about another cup to roll the balls in)
  • 1/2 Cup Pitted Dates
  • 1/2 Cup Gluten Free Flour

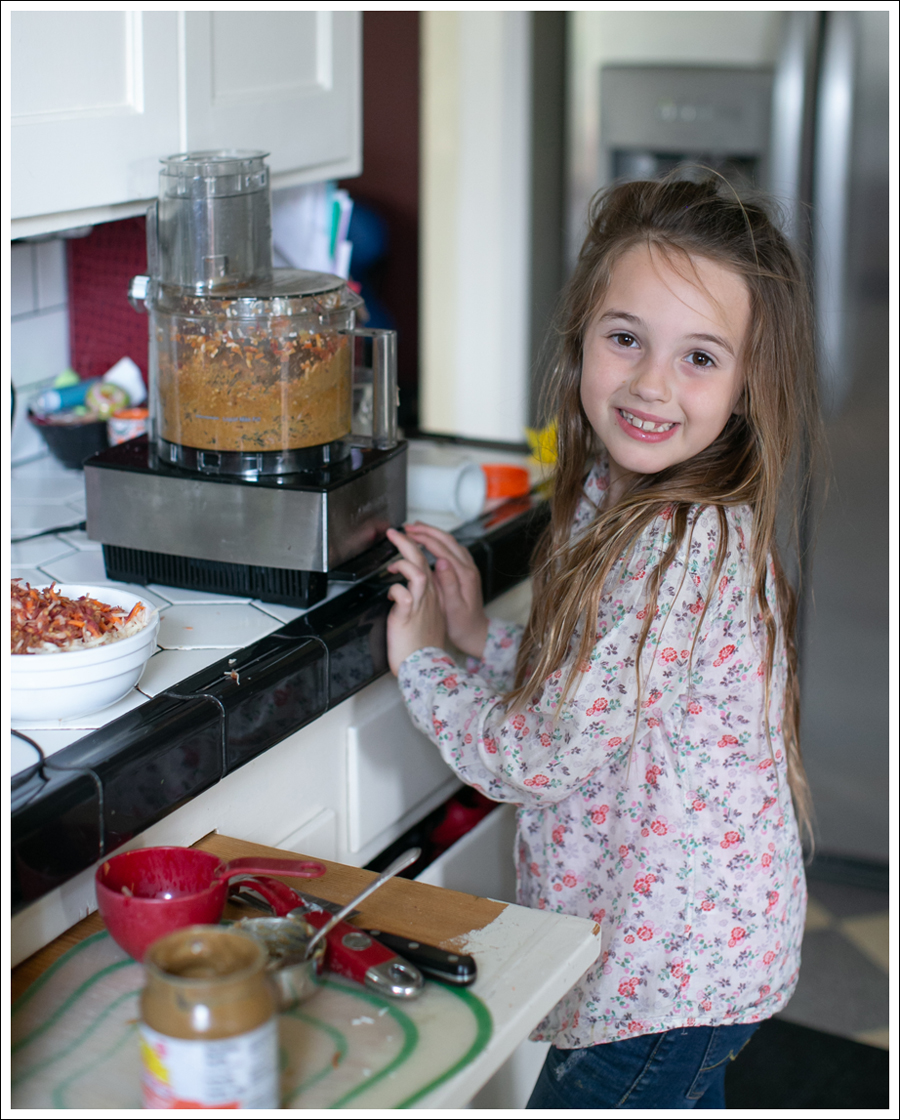
I did make sure she scrubbed her hands vigorously before she helped.  That pen didn’t want to come off… 🙂
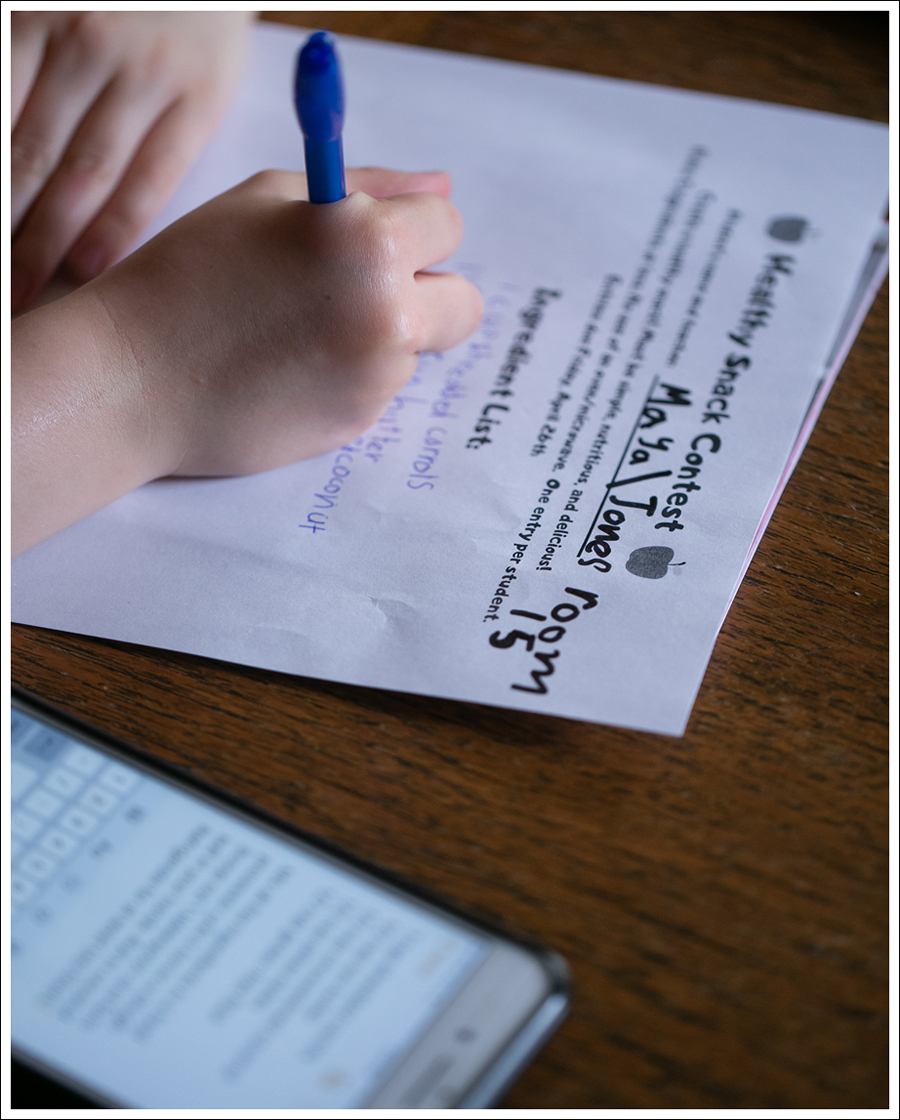
 I was so impressed.  She wrote out all the ingredients AND the instructions!
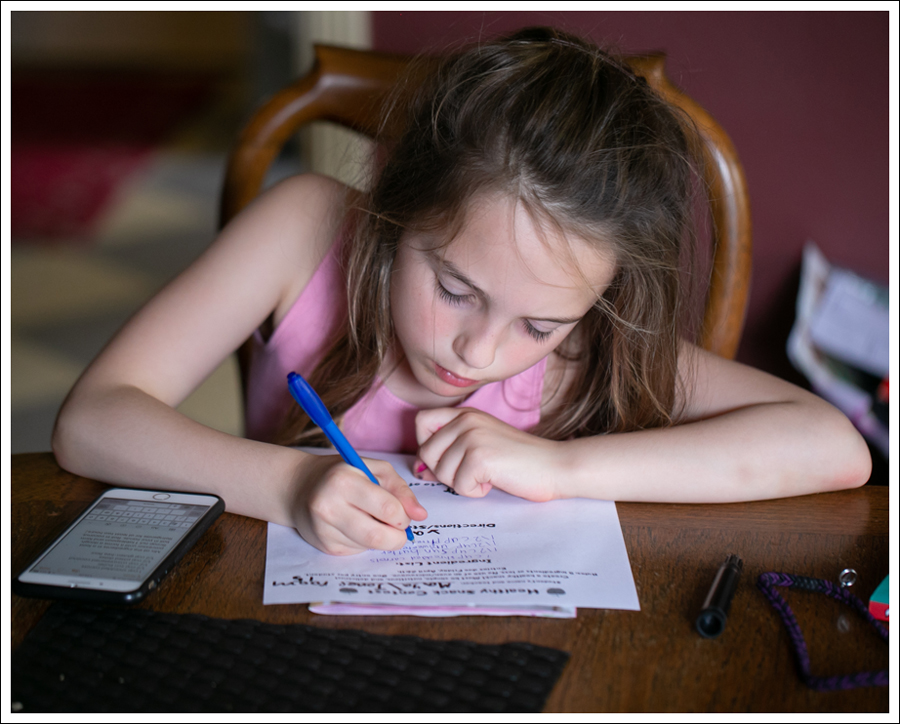
 ENJOY!

Lemon Bars with Lemon Curd Topping | Gluten Free + Dairy Free + Vegan

I’ve been dying to try a lemon bar recipe that Maya can have.  It’s pretty easy finding gluten free, but dairy and egg free are a little harder!

And then I found Minimalist Baker a few months ago on Instagram!

The minute I saw her Creamy Vegan Lemon Bars, I knew I wanted to try them!

I finally made the time yesterday for Easter, and they were so good!

I followed her recipe pretty much, with only a few exceptions, which I’ll note.

CRUST

  • 1 cup gluten-free oats
  • 1 cup almonds
  • 1/4 tsp sea salt
  • 4 pitted dates (original recipe called for 2 Tbsp coconut sugar, which I thought I had but didn’t.)
  • 1 Tbsp maple syrup
  • 4 Tbsp coconut oil (melted) (originally recipe said 4-5, but I went with the lesser due to the dates)

FILLING

  • 1 cup raw cashews
  • 1 cup coconut cream (the hardened portion at the top of full-fat coconut milk-I used the coconut cream from Trader Joe’s which is mostly cream)
  • 2 Tbsp arrowroot starch
  • 1/2 cup lemon juice
  • 1 heaping Tbsp lemon zest
  • 1 pinch sea salt
  • 1/4 cup maple syrup
  • 2 Tbsp organic powdered sugar (optional // for topping I didn’t use this)

Lemon Curd Topping

I had about 1/3 cup of coconut cream leftover in my can, so I decided to make a modified version of Minimalist Baker‘s Vegan Lemon Curd. The recipe called for a lot of the same ingredients I already had out, so it seemed like a no brainer.  AND…lemon curd on top of lemon bars?  YES, PLEASE!! .  Here’s how I modified to recipe, and the amount was perfect for a thin layer on top which I added right before serving.

  • 1/3 cup coconut cream
  • 1 tsp lemon zest
  • 1 Tbsp lemon juice
  • 1 tsp arrowroot starch
  • 1 Tbsp maple syrup

Instructions

  1. Add raw cashews to a mixing bowl and cover with boiling hot water. Let rest for 1 hour (uncovered). Then drain thoroughly.
  2. Preheat oven to 350 degrees and line an 8×8 inch baking dish with parchment paper (or tin foil).

  3. Add oats, almonds, sea salt, and dates to a high speed blender and mix on high until a fine meal is achieved.
  4. Transfer to a medium mixing bowl and add maple syrup and melted coconut oil, and add more oil if it’s too dry. Stir with a spoon to combine until a loose dough is formed.

    I accidentally did ALL this at the same time.  It didn’t blend as well, because the moisture made it clumpy… SO, if you see chunks of almonds in my crust that’s why!

  5. Transfer mixture to lined 8×8 pan and spread evenly.  I used my fingers to press the mixture down until it was evenly compacted.
  6. Bake for 15 minutes, then increase heat to 375 F and bake for 5 minutes more, or until the edges are golden brown and there is some browning on the surface. Remove from oven to cool slightly, then reduce oven heat to 350 degrees F (176 C).
  7. For the Filling… Once cashews are soaked and drained, add to a high speed blender with coconut cream, arrowroot starch, lemon juice, lemon zest, sea salt, and maple syrup. Mix on high until very creamy and smooth.
  8. Taste and adjust flavor as needed.
  9. Pour filling over the pre-baked crust and spread into an even layer. Tap on counter to remove any air bubbles.
  10. Bake for 20-23 minutes or until the edges look very slightly dry and the center appears “jiggly” but not liquidy.
  11. Let rest for 10 minutes, then transfer to refrigerator to let cool completely (uncovered) – at least 4 hours, preferably overnight.
  12. For the Lemon Curd…Place coconut cream and lemon zest in a small saucepan and whisk to combine.
  13. Add lemon juice and arrowroot starch to a small mixing bowl and whisk to thoroughly dissolve. Then add to coconut cream mixture and stir.
  14. Lastly, add maple syrup and whisk again until well combined.

  15. Place saucepan over medium heat and bring to a low bubble – not boil – whisking often. Once it starts bubbling and getting thick, reduce heat to medium-low and continue cooking until a visible ribbon forms when spooning a bit of the curd across the top. It should be thick and kind of jiggly in texture. During this process switch to a rubber spatula for stirring to ensure the curd isn’t sticking to the bottom or sides of the pan.
  16. Remove from heat and taste and adjust seasonings as needed, adding more lemon zest for acidity/brightness, or maple syrup for sweetness.
  17. Let rest for 15 minutes, then whisk once more and transfer to a glass bowl and cover with plastic wrap, making sure the plastic wrap touches the curd – otherwise a film may form (I didn’t do that and it was fine!).
  18. Refrigerate for 5-6 hours, or overnight, or until completely chilled and set.  I only let mine sit for 4 hours, and it was still great on top of the bars.
  19. To serve, spread the lemon curd over the bars, slice and top with fresh berries (optional)
  20. Store leftovers in the refrigerator, covered, up to 4 days, though best within the first 2 days.

ENJOY!!

I took this with my phone, as I didn’t have a lot of extra time to take pics while we were baking.  Super easy to let kids help you zest!  She also loved working our Vitamix!

4 Ingredient Protein Packed Pancakes (gluten free)

These were a total spur of the moment “I have stuff that’s going bad, and I should probably make something!” recipe.

I had made a quinoa dinner earlier in the week that I’ll hopefully post soon (practically a one pot easy meal!)  So…why am I posting this before that?   was that good!!  And more importantly…THAT EASY!  Oh, and should I mention-HEALTHY?!

Because this was that good!!  And more importantly…THAT EASY!  Oh, and should I mention-HEALTHY?!

When it’s a trifecta, I know I should blog it!  Ok, when it’s a trifecta, and I actually take pictures, I know I should blog it 🙂 

What you need… (makes 20 mini pancakes or 10 medium)

  • One overripe banana
  • One cup cooked quinoa
  • 2 eggs
  • 2 tablespoons unsweetened Almond Milk
  • 1/8 teaspoon vanilla extract (optional)

What you need to do…

  • Mash the banana, add everything else, and mix a lot (baby got back! ok, nevermind…)

blog-4-ingredient-protein-packed-gluten-free-pancakes-2 blog-4-ingredient-protein-packed-gluten-free-pancakes-3
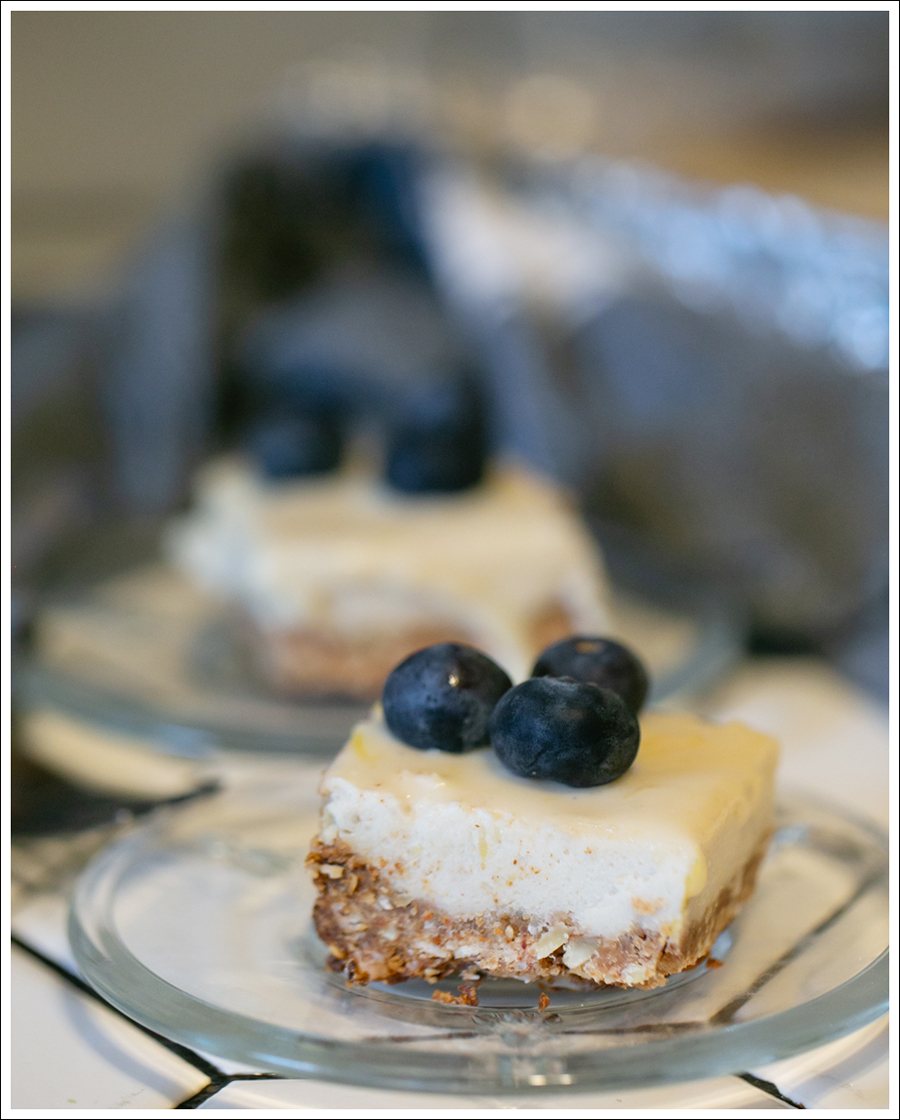
She’s usually up for being my baking assistant, but not always the willing photography assistant.  Totally understandable since it was first thing in the morning  🙂blog-4-ingredient-protein-packed-gluten-free-pancakes-4 blog-4-ingredient-protein-packed-gluten-free-pancakes-5
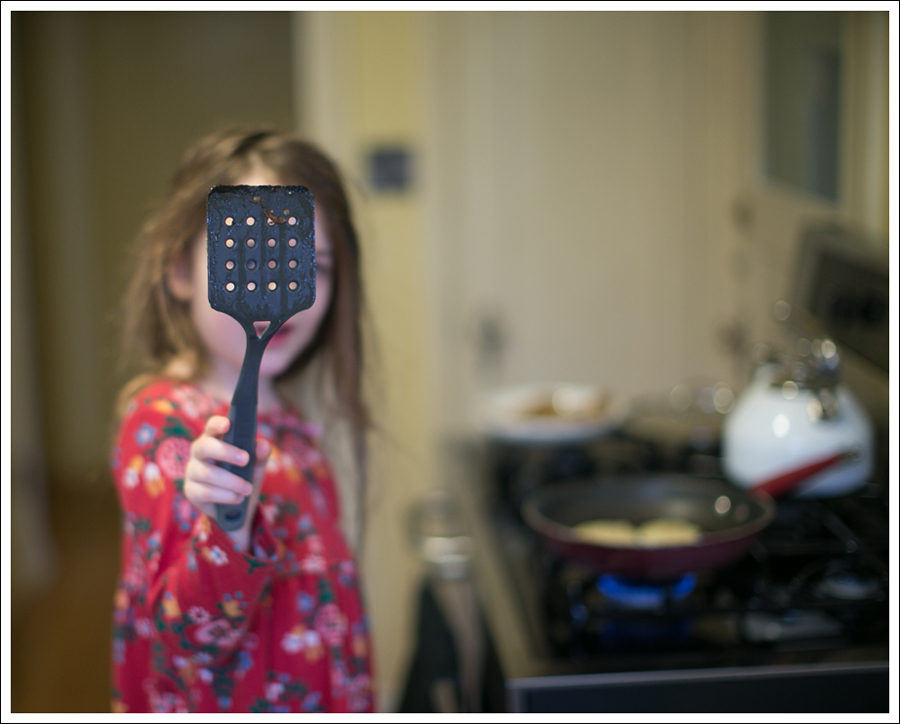
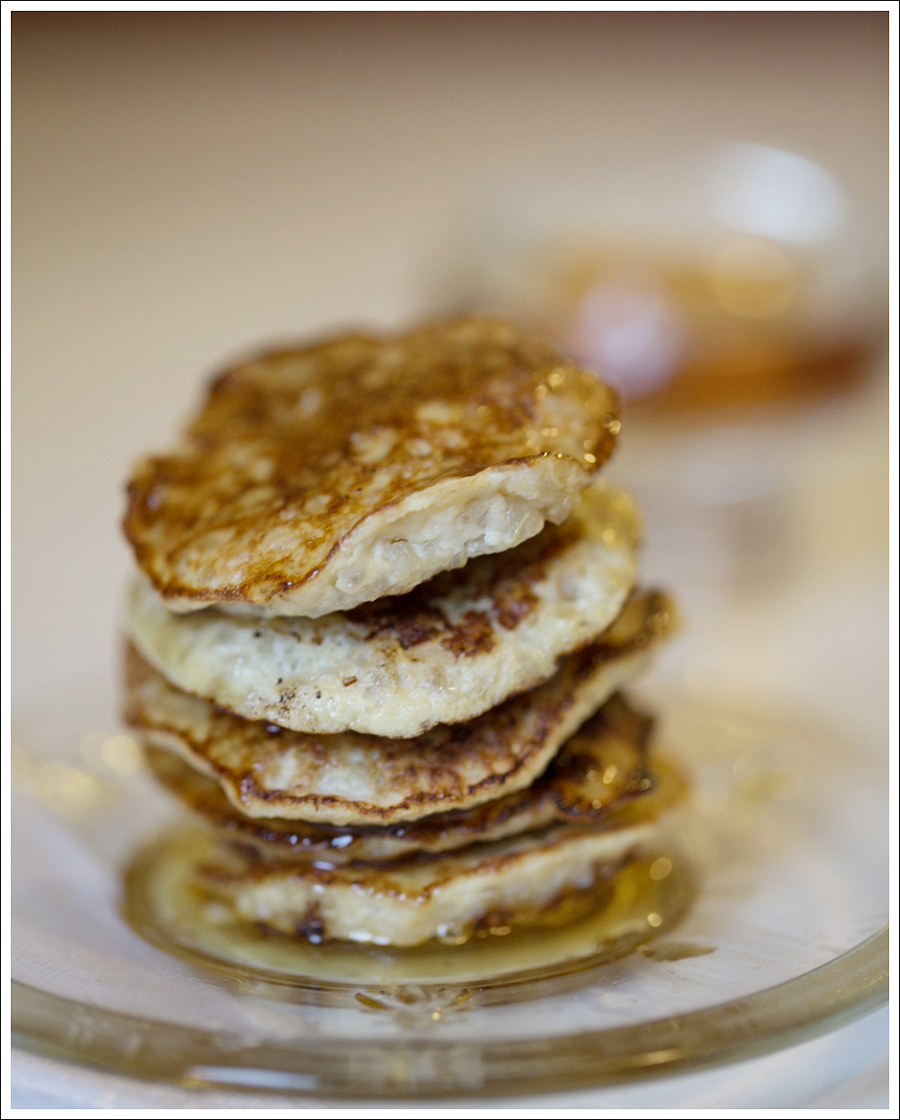
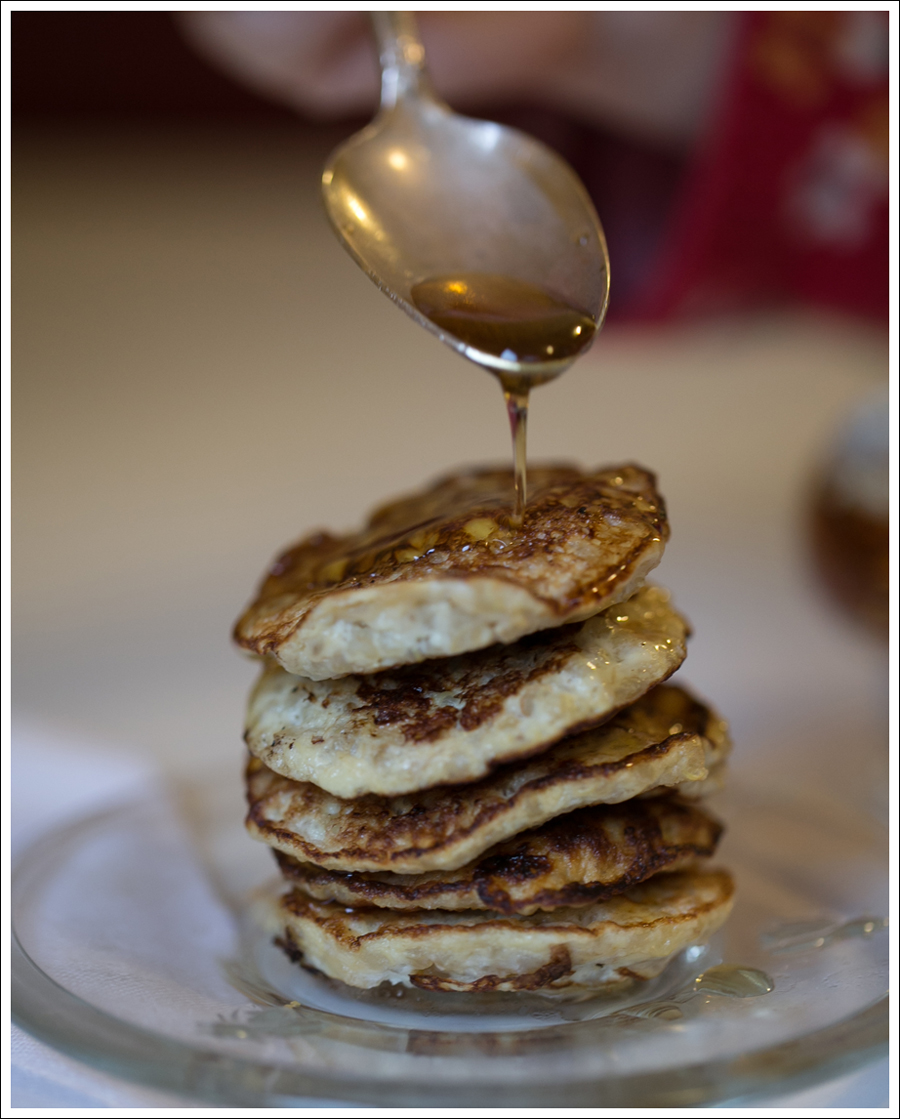
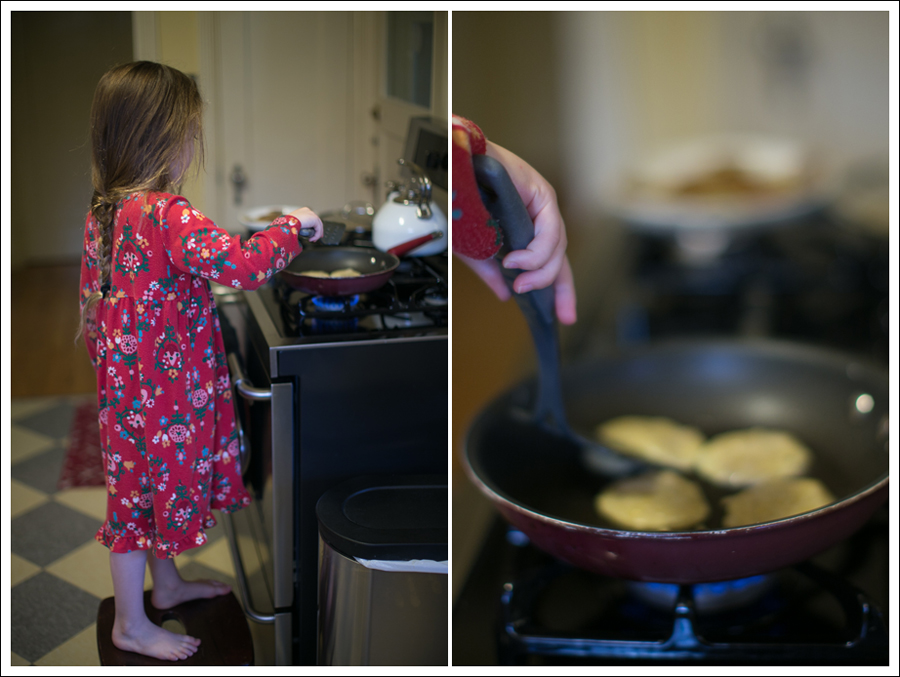
Above are Tablespoon mini pancakes for Maya, which she’s flipping (and are pictured stacked later)

Below are the 1/4 cup pancakes that I ate (as well as a few of her mini ones :)).
blog-4-ingredient-protein-packed-gluten-free-pancakes-6
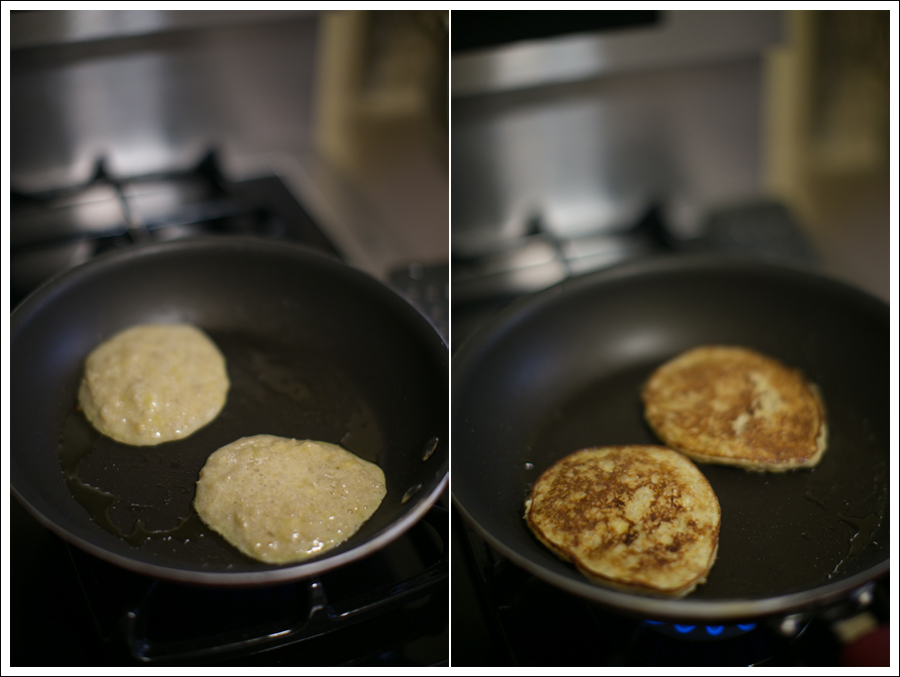
The mini ones were easier to photograph, and….could she be a better assistant???!! blog-4-ingredient-protein-packed-gluten-free-pancakes-8

Just for kicks, I entered everything into VeryWell.com.  If you eat the entire batch, it’s less than 500 calories and has 20 grams of protein!  Honestly, they were so filling, I ate half the batch myself, and then worked out.  I was totally satisfied until lunch!  Normally, I eat a lot more of-to be honest…processed calories usually, and am not as satisfied.  Lesson to be learned.  But, let’s be real.  This was super simple, easy, and quick to do, but…it wasn’t as quick as grabbing something with no clean up.  I GET IT!  I’ll let you know if they toast well haha.

Nutrition Facts
Serving Size 1 (423g)
Per Serving % Daily Value*
Calories 458
Total Fat 13.6g 21%
Saturated Fat 2.9g 15%
Trans Fat 0g
Cholesterol 327mg 109%
Sodium 160mg 7%
Potassium 564mg 16%
Total Carb 66.9g 22%
Dietary Fiber 8.2g 33%
Sugars 15.1g
Protein 20.5g

Enjoy!!dit-elle-Lauren

Grilled Orange Chicken with Onions and Quinoa

Last week I posted a recipe for a easy, refreshing, delicious Clementine Goat Cheese Salad.  I mentioned in that post, that I made this dish to go with it, and here it is!

I rarely use recipes (ironic, no?!), but one thing I love doing, is repeating flavors in the different dishes of the meal.  I used the same flavors in the chicken, the quinoa, and also the salad.  It cuts down on needing a bunch of different ingredients, and makes everything go so well together!

blog-orange-onion-chicken-and-quinioa-1
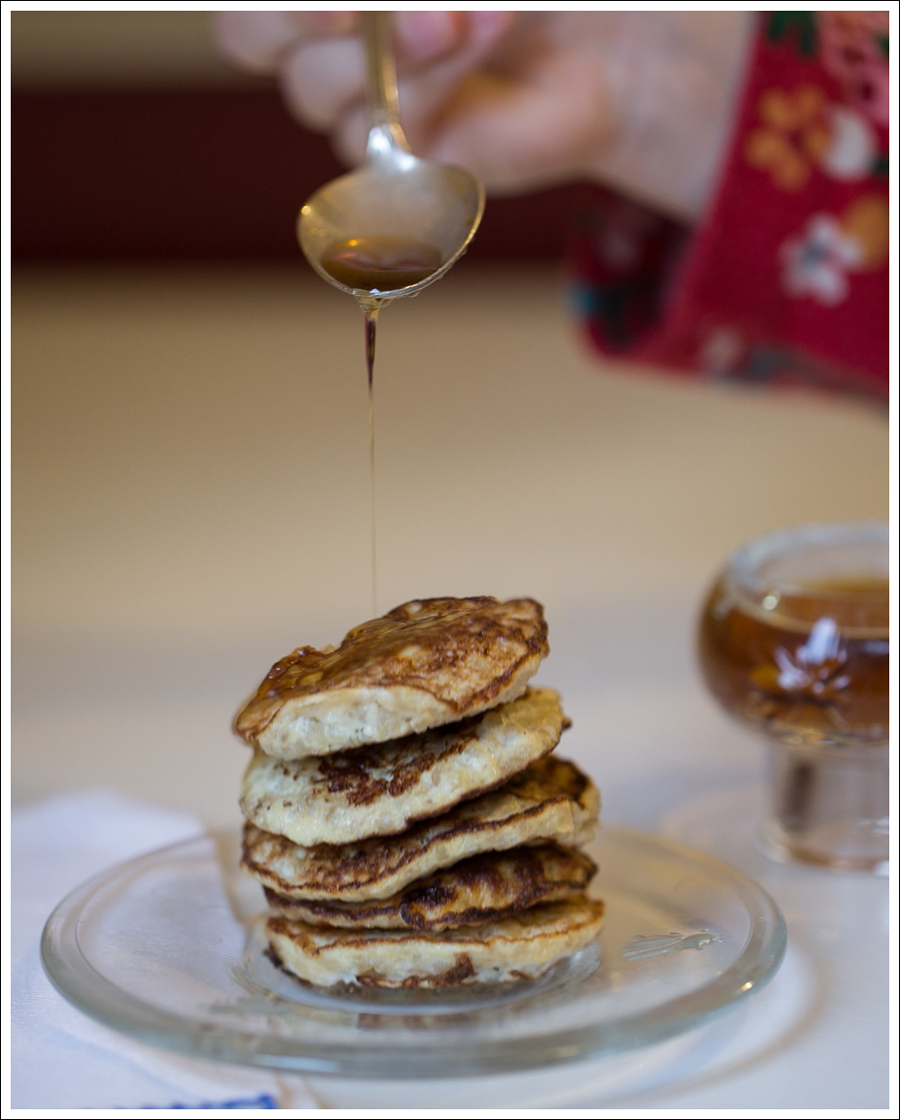
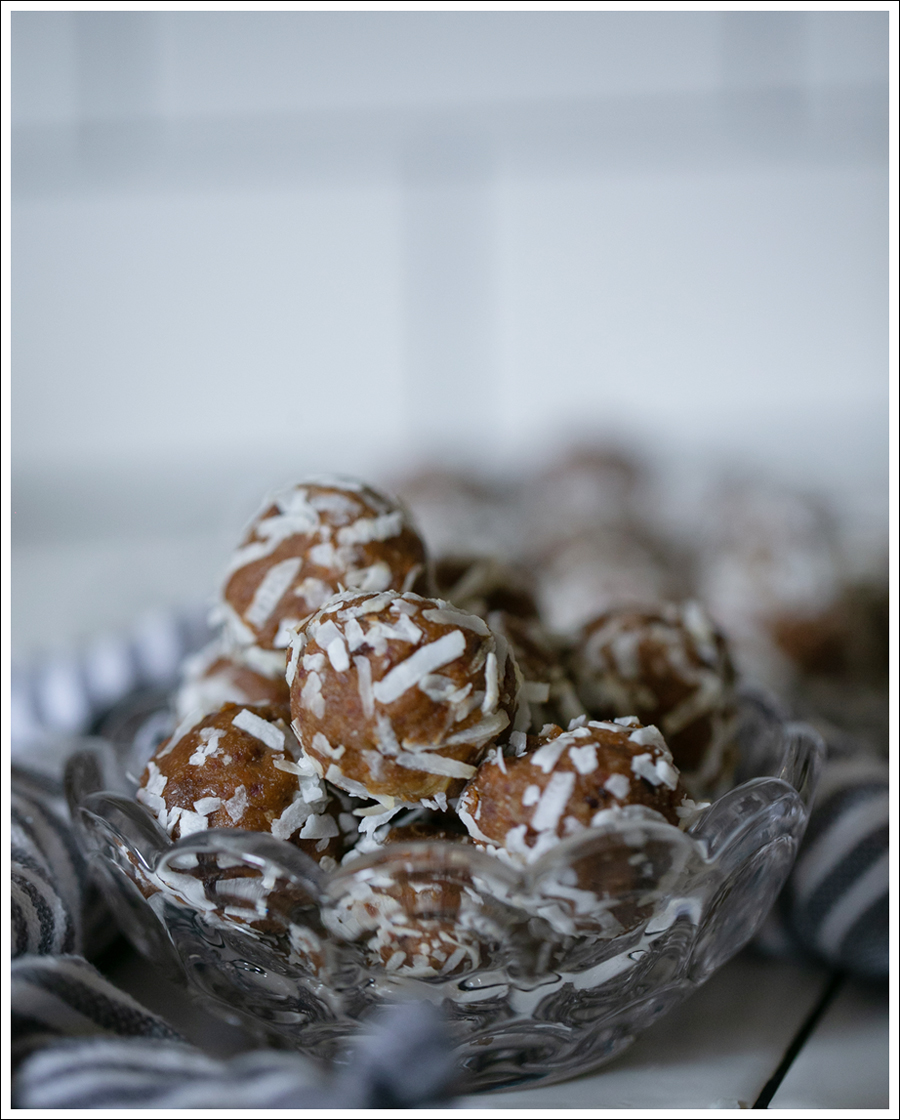
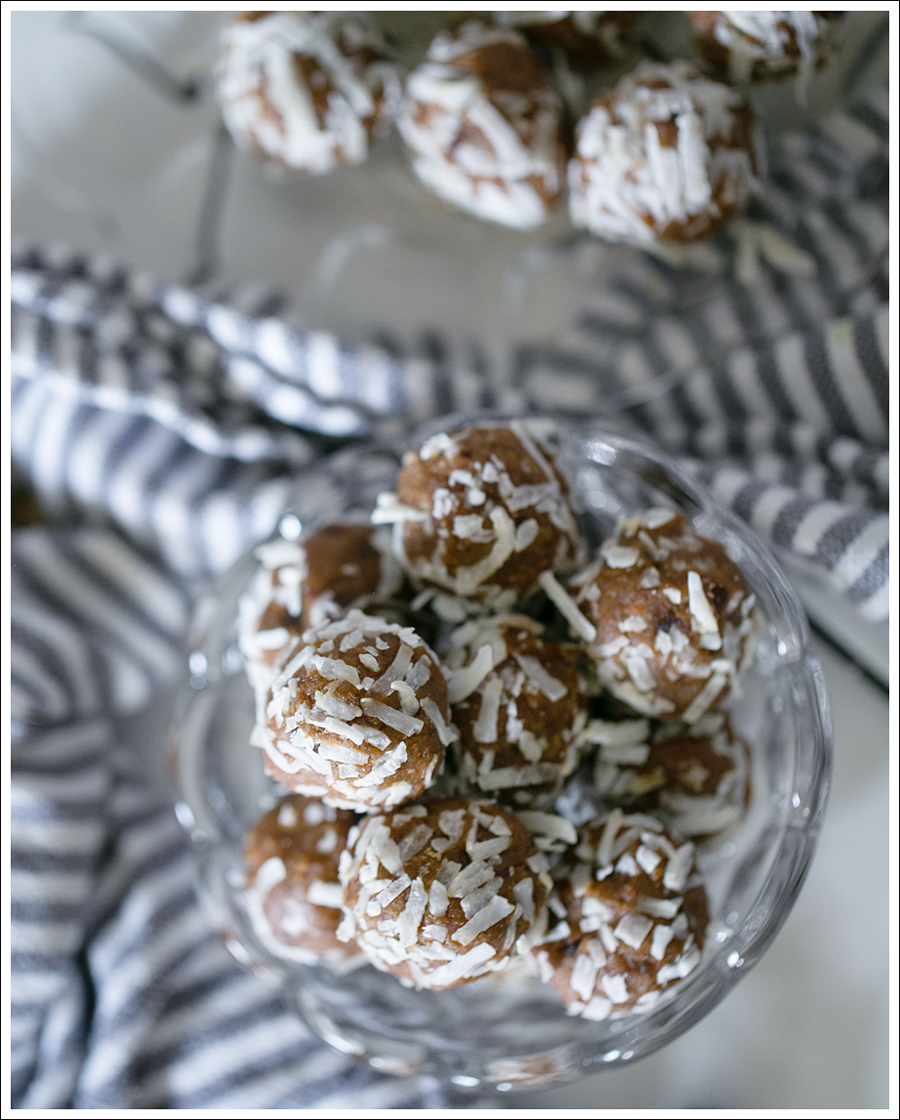
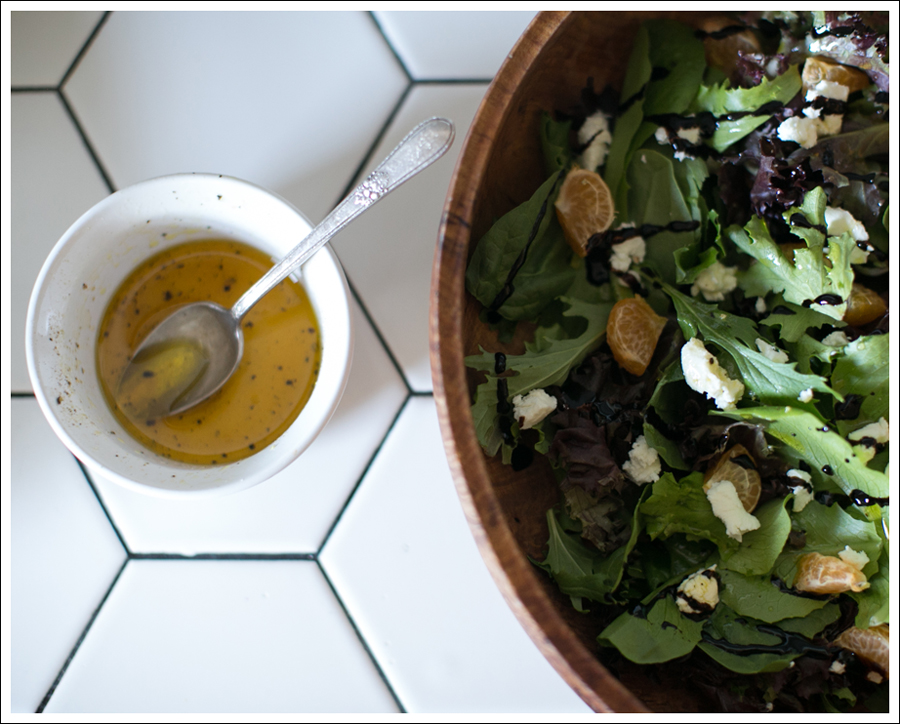
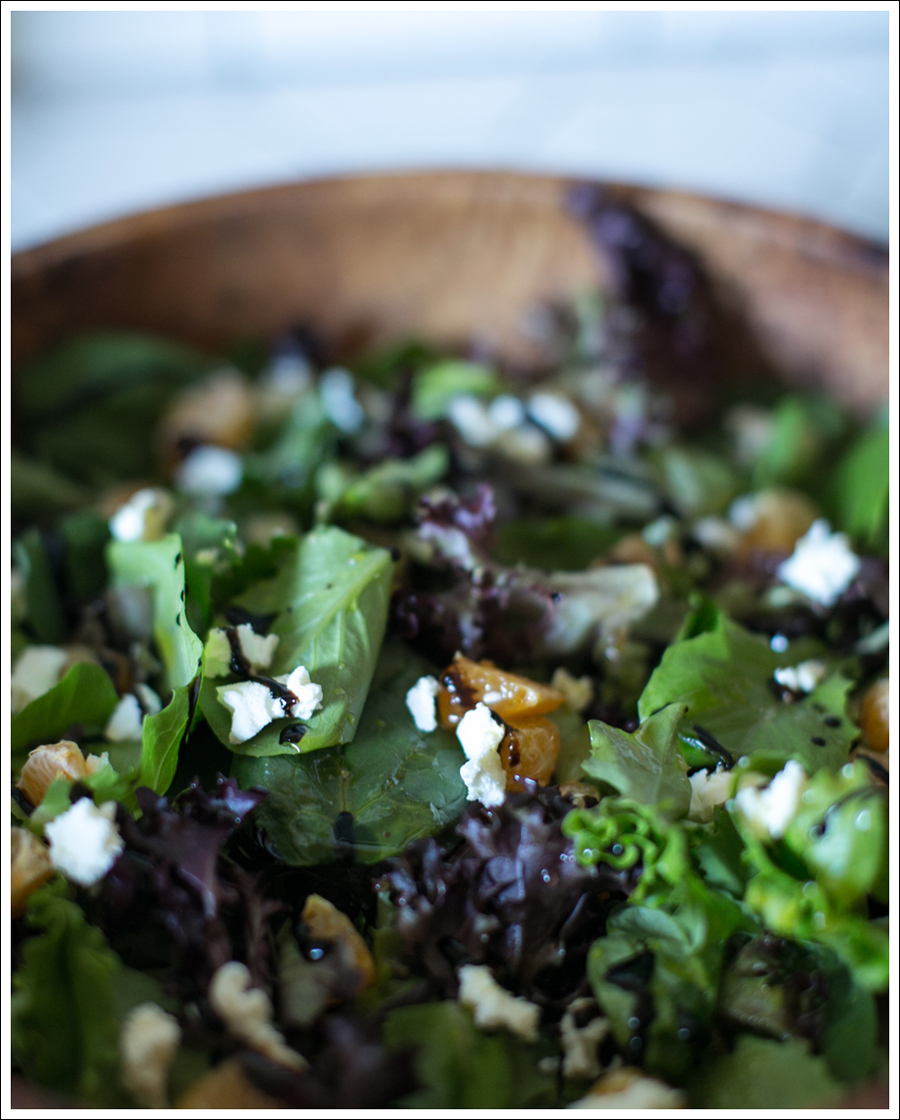
This tastes great on it’s own, but even better when paired with the salad… blog-orange-onion-chicken-and-quinioa-2

What You Need… (feeds 4)

  • 4  Chicken Breasts
  • 1/4 Cup Extra Virgin Olive Oil
  • 1 Tsp Minced Garlic
  • 1 Sprig of Rosemary or 1 Tablespoon
  • 1 Medium sized Orange
  • 1 medium sized onion
  • 1 Cup uncooked Quinoa (Omit or sub out with cauliflower rice for Paleo/Whole 30 option)
  • Sea Salt and Pepper to taste.

What You Do…

  • Pour Olive Oil, Garlic, Rosemary, and juice from half the orange, into a small bowl and stir.
  • Take 2/3rds of the liquid and pour over chicken breasts in a large bowl or zip lock bag.  Slice the other half of the orange and place inside bag/in bowl.  Salt and Pepper to taste.  Let that all marinate for 30+ minutes.  If you want to do this in the morning and let it marinate in the refrigerator all day…even better!
  • Slice Onion in 1/2 inch slices and drizzle with olive oil, salt and pepper.
  • Light your grill to medium heat and let it get hot.
  • Take quinoa and either place in a rice cooker (what I did) and add left over 1/3rd mixture from above and cook.  It’s usually done in 20 minutes.
  • Or, if you don’t have a rice cooker, cook on stove top with 2 cups water plus added 1/3rd left over mixture.  Bring to a boil.  Lower heat and let it cook covered for another 15 minutes.  Let it sit for another 5 minutes covered but with the heat turned off.  Fluff it up.
  • While Quinoa is cooking place chicken, onions, and orange slices on the grill.  Cook on each side for 7-8 minutes (depending on breast size).
  • Layer quinoa in a serving dish (I drizzled a little of the salad dressing over the top, but you could just drizzle with a little olive oil), then top with chicken, onions, and oranges.

Enjoy!!

dit-elle-Lauren

Clementine Goat Cheese Salad

Every night I try and make a big salad to go with dinner.  I like to throw in a lot of good veggies and or fruits to pack in the nutrients and vitamins in one yummy bowl.

Lately, I’ve been making my own dressing too.  I keep it pretty simple, but throw in fun things that compliment what’s in the salad every once in a while.

All in all it takes only a few minutes to throw this together, and it tastes light and delicious, yet packs in the flavor!

Next week I’ll post the Orange Chicken with Grilled Onions and Quinoa that I made to go along with this.  It all went so well together-YUM!

Blog Clementine Goat Cheese Salad-1 Blog Clementine Goat Cheese Salad2
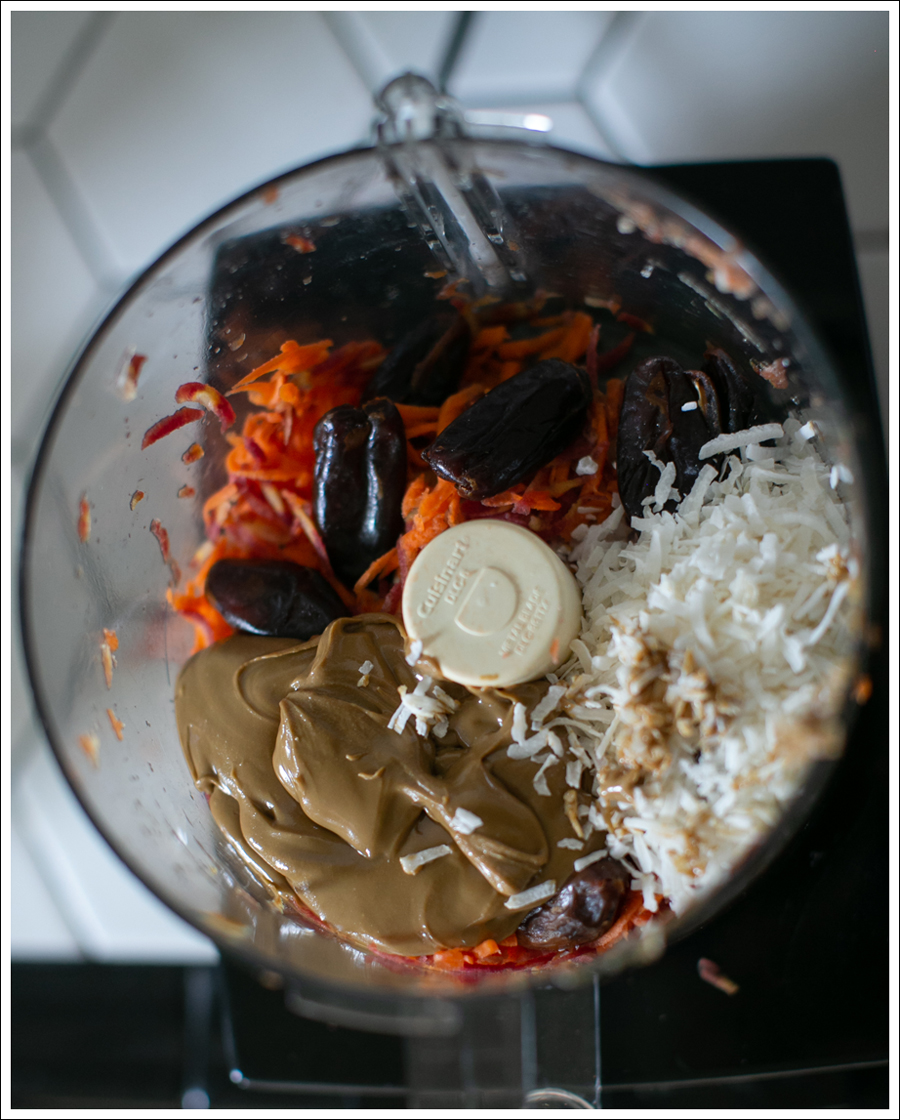
(I’ll be honest, I don’t measure, so the below are approximates to feed 3-4 people)

Dressing

  •  2 Tablespoons Extra Virgin Olive Oil
  • Juice from one crushed clementine
  • 1/2 Teaspoon Pure Maple Syrup
  • Salt and Pepper to taste
  • Drizzle all over the salad with Trader Joe’s Balsamic Glaze

Salad

  • One large handful of greens per person that you want to feed
  • 1-2 clementines quartered and sliced in half
  • 1 oz goat cheese crumbled (omit for Paleo or Whole 30 option)
  • Additional toppings that I frequently use (crushed almonds, or walnuts, pumpkin seeds, or hemp seeds)

Enjoy!dit-elle-Lauren

Balsamic Strawberries

I discovered strawberries with balsamic recently – wow – yum! Strawberry goodness with a pop from the vinegar and pepper. Try it!

balsamic strawberries blog

Ingredients

  • 2 cups strawberries, rinsed and sliced
  • 1/4 cup Balsamic vinegar
  • 1 Tbsp Sugar (optional, omit for paleo version)
  • Pepper to taste
  • Mint for garnish

Directions

  • Combine all ingredients and let marinade for at least an hour or up to four
  • Enjoy!

dit-elle-Esther

Blackberry Crisp with Vanilla Ice Cream

As mentioned in my blog post on the topic last week, Blackberry season is in full swing and so much fun! The berries are fun to pick, eat and make yummy things with. Today, a Blackberry Crisp.. pretty much paleo, but add some vanilla ice cream for some non-paleo, but totally delicious, goodness!

Blackberry paleo crumble 2016 with vanilla icecream for blog

Ingredients

  • 4 cups blackberries
  • 1/4 cup sweetener like honey or sugar as needed (if you have very ripe blackberries this may not be needed and you can certainly make it without sweetener for a slightly tarter crisp)

For the topping

  • 1 cup almond meal
  • 1/2 cup golden flax meal (or any ground flax)
  • 1 Tbsp honey
  • 1/4 cup butter
  • 1/2 tsp cinnamon
  • Vanilla Ice Cream and mint leaves for garnish

Directions

  • Rinse blackberries, drain well and pour into glass baking dish (9×11″ works well) and drizzle with some honey or sprinkle with sugar (as needed)
  • Mix topping ingredients with a fork until butter is distributed and ingredients are combined well
  • Sprinkle topping evenly over berries
  • Bake @ 350 for 35-45 minutes with tinfoil on. Remove tinfoil and bake for another 10 minutes as needed or until crust is a golden brown.
  • Enjoy with your favorite vanilla ice cream or drizzled with some cold coconut milk

Modified quite a bit, but thanks for the inspiration http://paleoleap.com/berry-crumble/

dit-elle-Esther

Watermelon Mint Infused Water

I’ve been wanting to try more infused waters lately.  In my mind, they are a lot of work, but really…they aren’t!

I carved up a watermelon for the 4th of July, and we had some pieces left over in the fridge that I didn’t think were going to get eaten.  SO…I poured some of the left over juice and a few pieces of watermelon with some mint into a few water bottles.

I mean to let them sit for a day, but… “LIFE”

Two days later, I tried them, and YUM!!!Blog Watermelon Mint Infused Water-1 Blog Watermelon Mint Infused Water-2 Blog Watermelon Mint Infused Water-3
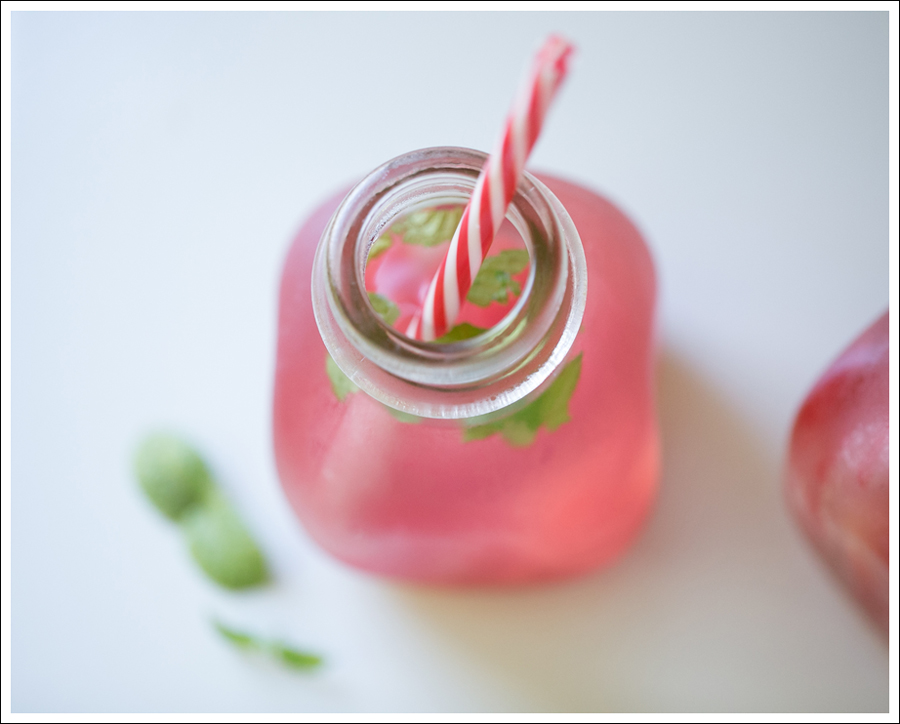
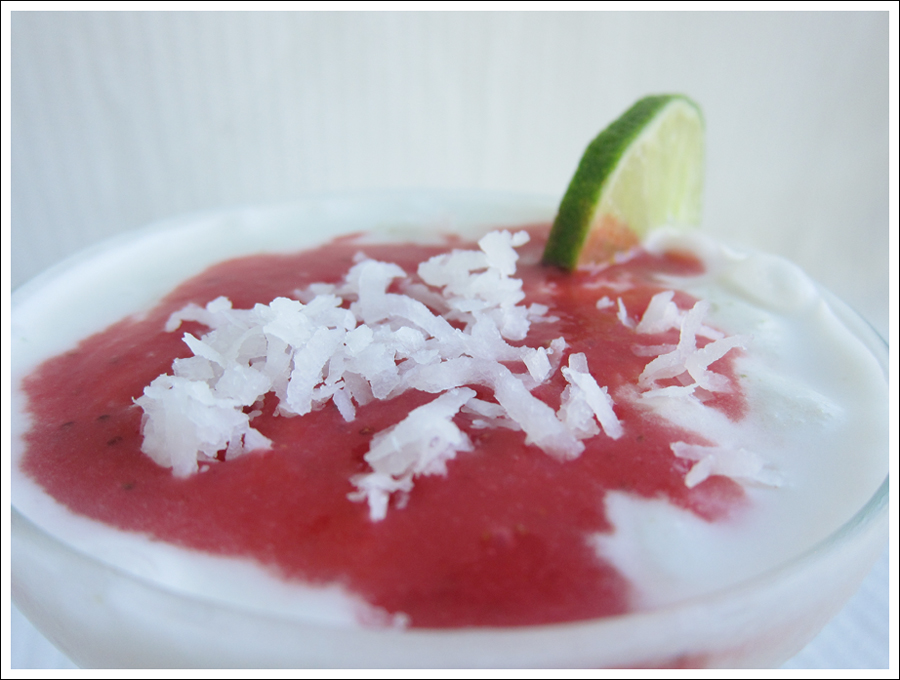
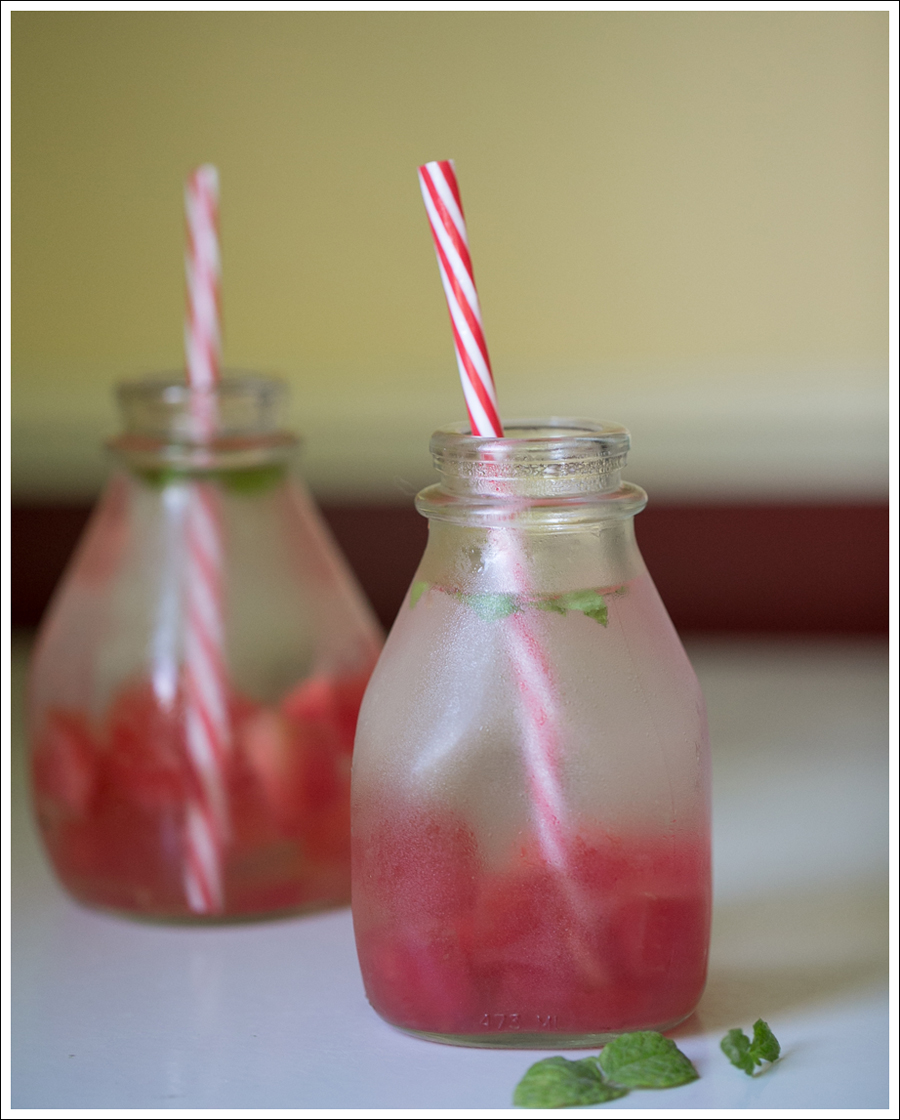
Maya wasn’t as sure.  She was more consumed with getting the watermelon out of the bottom haha 🙂
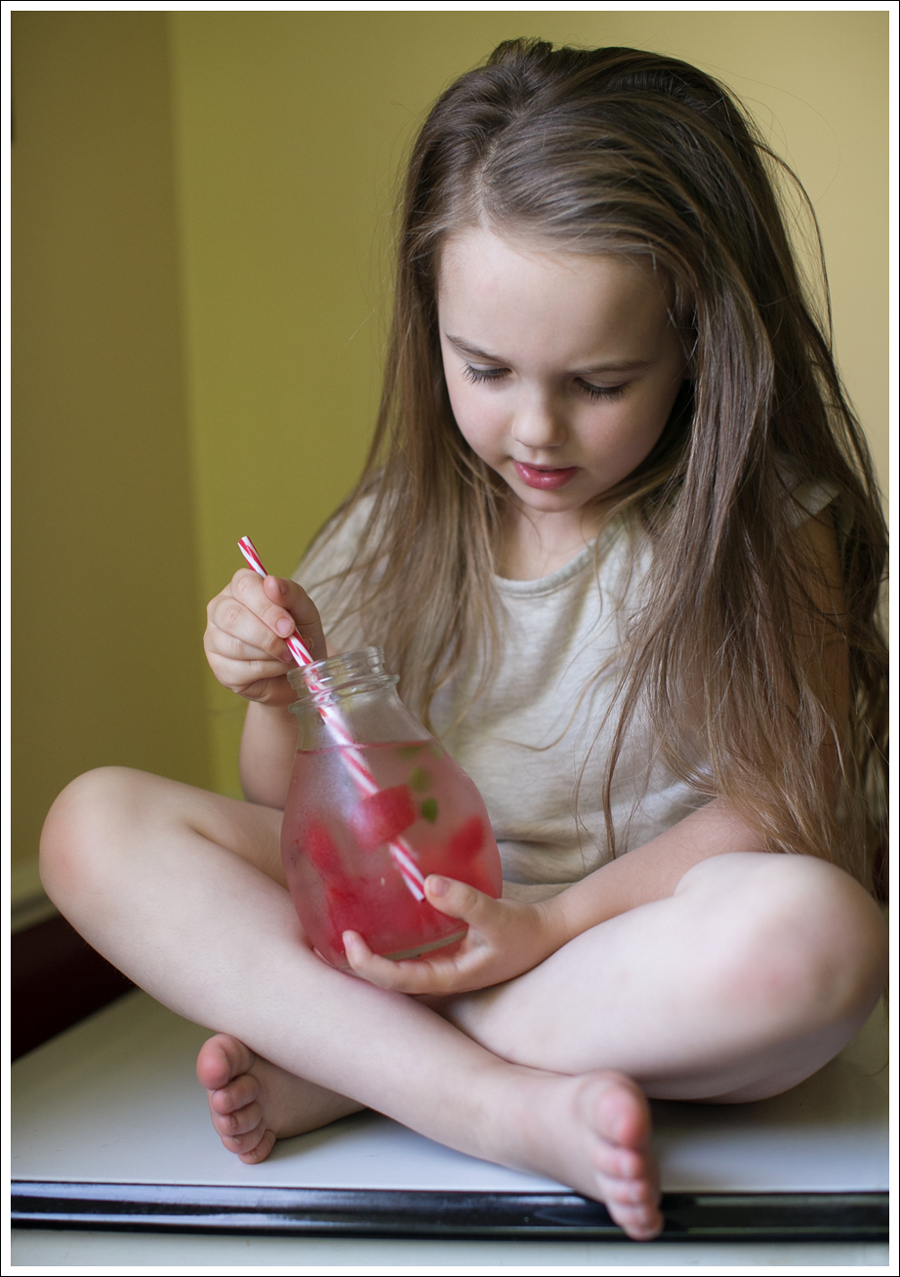
 Blog Watermelon Mint Infused Water-4What you need…

  • 2 cups of Watermelon (depending on how much water you want to infuse!)
  • 1/4 Cup Watermelon juice (I made this after I had cut a watermelon a few days earlier and there was juice at the bottom of the dish.  You could also muddle a few pieces if you are doing this all at once.)
  • 5-6 sprigs of mind torn into pieces

What you do…

  • Put water, watermelon, watermelon juice, and mint into (individual water glasses or a giant water container).
  • Let it sit overnight….or two 🙂  Then…

Enjoy!dit-elle-Lauren

Frozen Strawberry Lime Coconut Margaritas

Nothing says summer like a Frozen Strawberry Lime Coconut Margarita! Totally delicious and I made mini frozen slushies for the kids with the ingredients (except alcohol!). It was a nice cool treat for them, and you could serve this as a fun (non alcoholic) and festive dessert drink for grown-ups as well!

strawberry lime coconut margarita blog (3) strawberry lime coconut margarita blog (2) strawberry lime coconut margarita blog (1)

Ingredients

  • 1 cup coconut milk (full fat)
  • 1/4 cup Simple Syrup
  • Zest from 1 lime
  • 1/4 cup lime juice
  • 2 cups strawberries
  • 3 Tbsp lime juice
  • 3 oz tequila
  • Lime and shredded coconut for garnish

Directions

  • Combine first four ingredients in blender, blend until smooth and then pour into ice cube tray or a large Ziploc bag and freeze for 2-4 hours
  • Combine strawberries and 3 Tbsp lime juice in blender and blend until smooth
  • When ready to make margaritas, put frozen coconut lime mixture in blender and puree. At this point you can remove some for the kids. then add in tequila and blend until smooth.
  • Pour coconut lime mixture into four margarita glasses, add some strawberry puree to each glass and garnish with lime wedges and shredded coconut
  • Serve! Enjoy!

Inspired by Tequila Avion’s mini video on Instagram.

dit-elle-Esther