Dressing up a classic button down and flares…

 Can’t get much more classic than a white button down and jeans.  It will NEVER go out of style!!  But, there’s always ways to dress it up or dress it down.  I added a fun vintage scarf and cropped swing leather jacket for a more casual Valentine’s Day dinner idea.Blog Cropped Leather Jacket White Button Down Current Elliott Low Bell Flares Vintage Scarf-1 Blog Cropped Leather Jacket White Button Down Current Elliott Low Bell Flares Vintage Scarf-2 Blog Cropped Leather Jacket White Button Down Current Elliott Low Bell Flares Vintage Scarf-3 Blog Cropped Leather Jacket White Button Down Current Elliott Low Bell Flares Vintage Scarf-4 Blog Cropped Leather Jacket White Button Down Current Elliott Low Bell Flares Vintage Scarf-5 Blog Cropped Leather Jacket White Button Down Current Elliott Low Bell Flares Vintage Scarf-6

On me…

Leather Jacket- Classiques Entier (old)
Top- Club Monaco (thrifted, similar here)
Shoes- a Pair (thrifted, similar here)
Keeping it Real…
We never go out for Valentine’s Day.  I personally think the holiday is a little too over hyped, but it’s been fun seeing Maya get all excited about it!  The Huz always makes us something super yummy at home, so no crowds-yay!  So…this outfit was purely for fun to dress up in!  Which lasted all of 5 minutes, because I had to go pick Maya up from Preschool haha.  Honestly, I’ve thought about wearing this a few times on various date nights, but then went with something else.  I figured I’d at least wear it once for something!! 🙂  Honestly, I might do that a little more often while Maya is in school.  Wear things that I’ve always wanted to wear, but haven’t had the chance.
(all pictures taken with a self timer and tripod)

dit-elle-Lauren

Chocolate Covered Strawberries

I posted this for Valentine’s Day two years ago, but it is a timeless recipe. You simply can’t go wrong with chocolate covered strawberries! Need a quick, elegant and delicious dessert? Try this! Happy Valentine’s Day! 🙂

Blog chocostrawberries2 Blog chocostrawberries1

Ingredients

  • 1 cup dark chocolate chips
  • ⅓ cup coconut oil
  • 1 tablespoon vanilla extract
  • 1-2 lbs strawberries

Directions

  1. Combine chocolate chips and coconut oil in microwave safe dish
  2. Heat for 1 minute and stir
  3. Heat for additional time (in short amounts, stirring in between till chocolate is smooth and runny)
  4. Stir in vanilla extract
  5. Place in refrigerator for 15-30 minutes to thicken a little
  6. Remove from refrigerator, stir – ready for dipping!
  7. Dip clean dry fruit in chocolate and place on parchment paper lined baking sheet
  8. Put in fridge to set/harden
Blog chocorange

Orange wedges dipped in chocolate are pretty awesome too!

Thanks ElanasPantry for the frosting recipe that lends itself so well for dipping! 🙂

dit-elle-Esther

Non Candy Valentines with DIY Heart Glitter Cards

Daunted by the DIY Pinterest Valentine’s Day projects that you’ve been seeing??  Yeah, I feel ya.  We made play-do last year last year, and…we had a lot of fun!!  But…this year?  I didn’t have time!!  As most of you don’t!  If you do have time?  Totally make the play do!  It’s still in our fridge a year later, smells yummy, and we still play with it!  BUT…if you want something a tad bit easier…

You can still have your preschooler/kindergartner totally involved in Valentine’s Day projects even if they aren’t totally diy!  You can make them into a diy craft by involving them in the process!  I bought all my supplies from a Dollar Tree, spent less than $7, and involved Maya in every step of the way!  She helped pick out what we should buy (at $1 each, it was easy to say yes, but admittedly afterwards, I felt like we went overboard spending $7!)

Honestly, this would be a great idea for a birthday party parting bag (at least, I think so!).  At less than $1 per kid?!!?  Yet, lots of fun an useful things…score!Blog Non Candy Preschool Valentine Bags DIY Glitter Heart Card-1Two years ago, we made DIY Glitter Hearts for Valentine’s Day.  I remembered them being so easy, and that she had so much fun doing them, so we decided to not recreate the wheel.  Isn’t that the best advice ever?!!  WHY RECREATE THE WHEEL??? This year, Maya wrote her name all by herself on the back of each card.  An upgrade + Kind of a milestone! Blog Non Candy Preschool Valentine Bags DIY Glitter Heart Card-2I’m including links below to pretty much the exact same thing I bought for $1 each, but if you don’t have a Dollar Tree near you and want to put something similar together from Amazon…

What you need…

For the Valentine Bags

Blog Non Candy Preschool Valentine Bags DIY Glitter Heart Card

OR…I found a pack on Amazon that was kind of similar to what I put together.

Online Pack

What to do…

  • Yes.  You could assemble all these together yourself, and just have your preschooler work on the cards, but I wanted Maya to have a little more ownership since we weren’t doing a DIY craft for the actual Valentine.  SO, we turned it into a craft
  • She laid out how many bags that were in her class and counted them out (there were 25 in the bag, so we had some left over).Blog Non Candy Preschool Valentine Bags DIY Glitter Heart Card-3
  • Then she put one of each item into each bag.Blog Non Candy Preschool Valentine Bags DIY Glitter Heart Card-4 Blog Non Candy Preschool Valentine Bags DIY Glitter Heart Card-5 Blog Non Candy Preschool Valentine Bags DIY Glitter Heart Card-6
  • The bags came with end ties, so I tied them together with the cards at the end 🙂

For the Heart Cards

  • Card stock paper/water color paper, or I used a cardboard insert that had come in clothes I’ve bought online/t-shirts I buy for the Huz.  Yes, I save everything just in case.  Yes, I was so excited to finally use some of my hoarded craft supplies! 😉
  • Glue
  • Glitter
  • Hole Punch
  • Large sheet of aluminum foil for easy clean up
  • Cookie sheet or empty box (to contain the glitter bomb and glue :))

What you do…

  • Since we were doing this for Valentine’s Day, I cut little hearts out. You could do circles, or just squares/rectangles if you wanted to make cards for a different occasion.
  • Put the “cards” on a lined cookie sheet/box and let your toddler drizzle glue all over them.Blog Non Candy Preschool Valentine Bags DIY Glitter Heart Card-7
  • Then, while glue is still wet, have them go to town with the glitter!Blog Non Candy Preschool Valentine Bags DIY Glitter Heart Card-8I shook all the excess of some cards onto others so that the glitter was evenly distributed. Blog Non Candy Preschool Valentine Bags DIY Glitter Heart Card-9
  • Once the glue is dry, punch a hole in the corner and tie to the bags.

Have Fun!!dit-elle-Lauren

Sweet Potato Hash with Spinach and Eggs

Good morning! Sweet potatoes, sausage, egg and greens tossed in a skillet makes an excellent breakfast. There are a few steps, so this is a great weekend breakfast to make during that first cup or two of coffee. 😉 Paleo, gluten free, and wonderful served with fresh fruit or berries!

yam spinach egg hash blog (3) yam spinach egg hash blog (2) yam spinach egg hash blog (1)

Ingredients

  • 2 tablespoons high-heat oil, divided
  • 1 pound fresh sausage (optional)
  • 1/2 onion, thinly sliced
  • 3 cloves garlic, minced
  • 1 1/2 pounds garnet or jewel yams, or sweet potatoes, scrubbed and cut into 1/2-inch cubes
  • 1 bunch spinach or kale, tough stems removed and leaves chopped
  • Salt, black pepper, and/or red chili flakes to taste
  • 4 eggs

Directions

  • Heat 1 tablespoon oil in skillet over medium-high heat. Add sausage (if using); crumble and cook until no longer pink. Add onion, garlic and cook until onion is soft, 5 to 7 minutes. Remove mixture from pan.
  • Heat remaining oil in skillet and add yams. Cook until golden and tender, stirring occasionally, about 20 minutes. Return sausage mixture to the skillet. Stir in spinach or kale and toss with potatoes and meat. Now, using a spoon, make 4 shallow indentations in the hash and crack 1 egg into each indentation. Reduce heat to medium-low, cover, and cook until whites are set, 8 to 10 minutes. Serve immediately.
  • Enjoy!

Thanks PCC Natural Markets for the inspiration (modified and shortened recipe from the original and it was still great)!

dit-elle-Esther

Cozy Knits + Destroyed Skinny Boyfriends + Clogs

 Just a fair warning.  There are a LOT of shots in this post, because I gave the remote over to Maya, and she clicks the button just about every second.  Needless to say.  She took a bunch of fun shots in the 15 minutes we took pictures haha. 😉

Blog Free People Ryanne Joes Jeans Cigarette Shae Swedish Hasbeens Fidelli Clogs-1 Blog Free People Ryanne Joes Jeans Cigarette Shae Swedish Hasbeens Fidelli Clogs-2 Blog Free People Ryanne Joes Jeans Cigarette Shae Swedish Hasbeens Fidelli Clogs-3 Blog Free People Ryanne Joes Jeans Cigarette Shae Swedish Hasbeens Fidelli Clogs-4 Blog Free People Ryanne Joes Jeans Cigarette Shae Swedish Hasbeens Fidelli Clogs-5 Blog Free People Ryanne Joes Jeans Cigarette Shae Swedish Hasbeens Fidelli Clogs-6 Blog Free People Ryanne Joes Jeans Cigarette Shae Swedish Hasbeens Fidelli Clogs-7 Blog Free People Ryanne Joes Jeans Cigarette Shae Swedish Hasbeens Fidelli Clogs-8 Blog Free People Ryanne Joes Jeans Cigarette Shae Swedish Hasbeens Fidelli Clogs-9 Blog Free People Ryanne Joes Jeans Cigarette Shae Swedish Hasbeens Fidelli Clogs-10 Funny enough.  In the beginning, she was like “NO PICTURES!!”  Which is extra funny considering what happens next 🙂

That face????  I can’t even handle her sometimes…and, she knows it ;}Blog Toddler Levis Jacket Hanna Andersson Tiered Dress Kamik Rain Boots-1Kind of impressed by the air she caught! Blog Toddler Levis Jacket Hanna Andersson Tiered Dress Kamik Rain Boots-2 Blog Toddler Levis Jacket Hanna Andersson Tiered Dress Kamik Rain Boots-3 Blog Toddler Levis Jacket Hanna Andersson Tiered Dress Kamik Rain Boots-4 And the wiggle butt.  It follows just about everything now a days…

A video to Daddy…wiggle butt.

Saying good bye to Meme and BOPO as we leave their house…wiggle butt.Blog Toddler Levis Jacket Hanna Andersson Tiered Dress Kamik Rain Boots-5Whatever makes her happy though, right? Blog Toddler Levis Jacket Hanna Andersson Tiered Dress Kamik Rain Boots-6 Blog Toddler Levis Jacket Hanna Andersson Tiered Dress Kamik Rain Boots-7 Blog Toddler Levis Jacket Hanna Andersson Tiered Dress Kamik Rain Boots-8 Blog Toddler Levis Jacket Hanna Andersson Tiered Dress Kamik Rain Boots-9 On me…

Sweater- Free People “Ryanne” (sold out, loving this striped one here)
Jeans- Joe’s Jeans “Cigarette in Shae” (Nordstrom Rack, similar here, less expensive here)
On Maya…
Jacket- Levi’s (thrifted)
Dress- Hanna Andersson (Thrifted)
Leggings- Hanna Andersson (thrifted)

Boots- Kamik Stomp Rain Boots (thrifted, similar here)

Keeping it Real…
SOOOOO…if you didn’t have ALL the other pictures as proof (and I promise, there were about 100+ more that I didn’t post!!), you’d think this kid didn’t want to be held or have her picture taken by the below image… ;|
Blog Outtake-1BUT…I’ve said it before, and I’ll say it again.  Kids rarely want their picture taken, but they always want to play and have fun with you.  The trick for me with the tripod, is making her forget about it, or turning it into a game.  Both of those scenarios end as a win for both of us!
Until the game is just want to run away from you 😉
Blog Outtake-2
(all pictures taken with a self timer/shutter release and tripod, except ones of Maya :))

dit-elle-Lauren

Staying Fit as a Mom…

Gosh…now, there’s a title!!

Before I became a mom, I heard and saw so many tales of things that frankly…scared the crap out of me!!

I’m going to gain a bunch of weight?  I’ll have a bunch of stretch marks?  I won’t have time or energy to work out afterwards?  I will live in yoga pants (but damnit they’ll be CUTE!! ;}) and yearn for the days of my youth when I dressed up, actually wore make up, and looked good everyday?!!!

YES!!!!  Those things are all true.  And….yet, NO, they don’t have to be!!!Sir John Lubbock QuoteGosh, this is so true for SO many things!!

For Me.  I don’t really make the time to do my hair, make up, or nails.  When I do, it’s a total luxury.  And, truth be told.  I wish I had time to cook amazing meals for my family every night.  Let’s be honest.  I could…if it was important to me.  BUT, I usually throw together the same 5 things on repeat, and only branch out now and then (and obviously blog about it when I do haha!).

Anywho…

Here’s my top 5 ways I stay healthy.

  1. Food.  I try and keep to an 80/20 rule.  Ok…70/30, but maaaaybe 60/40 sometimes. ;} Try to keep the healthy eating to a majority.  For me, if I go to too much of an extreme, I give up.  Then…I go off the deep end in the other direction.  I have MAD RESPECT for all of you that strictly stick to Whole30, any kind of cleanse, or other diets.  I think the most important thing is listening to YOUR body, and what’s best for YOU!  But, if you want it to be a way of life vs a diet, I strongly recommend some leeway for things here and there, unless of course it’s a health concern or allergy!
  1. Do not weigh yourself every day, BUT do weigh yourself once a week.  Yes, muscle weighs more than fat.  And yes, SALT can make the scale say you gained a &^%$ ton of weight!!  BUT…if you try and limit it to once a week.  You will have a gauge.  For me, I can talk myself into it being all good by squeezing into my favorite stretchy jeans, when I KNOW that it hasn’t.  So, I need to have a little check in to catch myself.  I try and give my self a 5 lb swing.  When I get over that 5 lbs, that’s when I know I have to button down the hatches and get back on track.  And to be real.  I go up and down those 5 lbs all the time.

3.  Join a gym that has FREE child care!!  I should have made this #1, because….DUH!!  FREE CHILD CARE!!!  We became members of the YMCA about a year ago, and it was the BEST THING WE’VE EVER DONE!!!  Ok, that might be a sliiiiiight exageration, BUT….FREE CHILD CARE!!  For…TWO HOURS!!  Where your kid runs around on amazing fun equipment, does CRAFTS!!!, and plays with kids their age….all the while, YOU get to work out, OR…shower (UNINTERUPTED!), OR…work on your laptop in the lobby, OR…just sit and stretch all the while coasting on social media, that you never have time for otherwise ;}  Have I totally given you a glimpse of my life??  YES I HAVE!  (If you don’t have the money for a gym membership, there are SO many at home videos or workouts on Pinterest that you can do from home)  Then, your kids can SEE you working out, and it shows them how important it is.

OR

4. When Maya was smaller, I wore her all the time.  My Ergo was my best friend.  I had a C-Section, so working out was a no go for a while.  So…I wore her, and I walked.  It was amazing.  I got out of the house-YAY!  I had her next to me-YAY!  She got fresh air-YAY!  And I burned a lot of calories while doing something that I loved, that wasn’t overly exerting.  It had me spending time with my daughter, oh and I usually went with my parents or friends.  More time spent with family and friends is a total win and a luxury when you’re a busy parent!

5.  Get some cute work out clothes.  Ok, that might just be me, but if you are looking at this blog, then it’s most likely you too!!  I swear when I have a cute outfit on, I feel better!  If that makes me shallow, then…well, there you go.  It’s no secret that I buy the majority of my clothing at thrift stores, on eBay, on ThredUP, or my local consignment stores.  You do NOT have to spend a ton of money on work out clothing.  And if it creeps you out.  Wash it on sanitize.  It’s NO different.  Get over it, and look cute!  On someone else’s dime 😉

Fitness and trying to stay healthy is important to both Esther and I.  We might start doing a few posts here and there about it.  Would that interest anyone?  We ABSOLUTELY welcome comments on how YOU fit everything in and stay healthy and fit as a mom!  Or, if you have any questions, fire away!!

For more fitness inspiration, check out Esther’s Post on how she went from not really “getting” yoga, to getting totally hooked on  Hot Yoga from yesterday!dit-elle-Lauren

Don’t like yoga? Try hot!

yoga toes blog

I have been sort of obsessed with hot yoga this past year and wanted to share this story as part of our goal to share mom life & fashion stories, recipes and wellness tips! 🙂

As snowstorms are raging around the country I’m reminded of my first hot yoga class a year ago. People had raved about hot yoga for years. “Try it, it’s amazing” they would say. But I was suspicious. I had tried yoga on several occasions without any apparent benefit. Still mind, relaxed body? Don’t think so. Was hot yoga going to be just another frustrating and non-relaxing yoga class, but hot? Sounded stifling.

I’m not a “yoga person”. From my limited past experience I had concluded that it simply wasn’t for me.. physically, emotionally, or mentally. I’m tall and notoriously inflexible. My mind is never still, always working to solve some problem, run through a to-do list, or daydreaming. But one gray evening, in the heart of the damp Seattle winter, I decided hot yoga sounded like just the warm hug I needed. Looking like a true Seattlelite, I set out with my yoga mat, towel and water bottle to give yoga another try.

I remember one of my first classes. “Your planks are looking good,” the instructor said as we were all starting to shake in our forward planks, legs and arms outstretched with palms and toes anchored to the floor. “Now in one swift movement like a panther, you’re going to leap and land in between your hands.” Panther!? I saw blurred flashes out of the corners of my eyes. Black clothed yogis jumped, effortlessly, silently, landing in position. I awkwardly ‘toe heeled’ my way up in a – let’s just say – less than pantherlike fashion. “We’re going to get ready for our headstands,” the instructor continued. Headstand!? I was certain the class description had said “all levels welcome”.

We had moved from the center of the room to the walls. In more fluid movements people were throwing their legs up in the air. “This can’t be happening, I cannot physically get in to a headstand,” I thought. The instructor came over to help. “Yay!” she cried when I was somehow in place and upside down, “you now have a new party trick,” she giggled joyfully and moved on to adjust someone else. “I don’t think I can get down,” I wanted to say, but I couldn’t get the words out.

There were many of those moments in yoga. Moments I thought belonged on Saturday Night Live. Awkward poses. People toppling over in Dancer or Bow Pulling pose. But no one got stuck. And only one class I tried included panther jumps and headstands. For the most part, the hot yoga classes had poses that everyone could easily do, but challenged you to find balance and core strength. And you worked so hard in that sweltering heat, you were forced to find some quiet and focus. I finally found my fit in the Hot Hatha style of yoga.

Here’s the thing about any type of hot yoga. It’s very uncomfortable. The only thing you can think of is “no more!” But then you say “yes I can”. And you do. And you survive. And the sweat drips. And you start to accept that the room is not getting any cooler, and you have about 59 minutes left of class. But here’s the other thing. You have to be uncomfortable first to get comfortable later. Just like life – it’s not comfortable, it’s full of discomfort. When you accept that, when you let go, when you say “OK, let’s get hot and do this thing,” the class gets a little easier and you can find peace in the moment.

In yoga you can find peace with turbulence and disruption. You realize you can work through it instead of fighting it.

Everyone was beautiful in yoga. The classes were always filled with a diverse set of people.. different shapes and sizes, people from different wakes of life. Men, women, old, young, big, small. There was a woman who had done an Ironman and just wanted to stay in shape. There was a young woman who could bend into shapes I didn’t think possible. There was a guy who was basically a human fountain. By the end of class, the pool around him was so large you had to walk in a circle to avoid slipping. Nevertheless, we were all there together with a common goal and on a yoga journey. There was always this great positive energy in the room and a sense of peace and calm.

Yoga makes you learn many things to counteract bad physical habits acquired while sitting at a desk. Tension in your shoulders, neck and back starts to dissipate. Emotionally, you realize that turbulence and disruption is not so challenging anymore. And as with any vigorous workout, your body releases endorphins and at some point, you start to feel really, really, really, really good.

So, if you ever thought yoga is just a bunch of stretches plus an attempt at meditating, try a hot yoga class! Some people can’t stand heat, but if you can, it helps with flexibility, the sweating is enormously cleansing, and standing on a floor with radiant heat feels amazing. Beyond that though, it’s an incredibly intense workout that combines core strength, balance, and endurance. And you will get to the end of class.

Finally, the best moment in yoga is at the end of class when you simply lie flat on your back with arms and legs relaxed.. endorphins unfurl through your body while you rest. You feel energized, restored and ready to reenter the world to take on the next challenge with an open mind. And as we awoke from a deeply relaxed state, wiped off the sweat and bundled up to go back out into the cold, dark night, I knew one thing. I would be back.

What’s your experience? Have you found yoga to be a fit for you?

dit-elle-Esther

4 Ingredient Quinoa + Sun Butter + Maple Syrup + Hemp Seed Protein Balls

I may be alone here, but I don’t think I am.  As a busy mom, granola bars/protein bars are kind of a must to survive.  Both for us and our kids!!  Grab on the go.  Or in between snack that you want to feel ok giving them, BUT…so many have a LOT of ingredients that you may or may not be ok with, but you do it anyways, because….SURVIVAL.  And…they can be really expensive if you don’t buy them in bulk.  I’ve been dying to make my own, but it seemed like a LOT of work.  SO….I abbreviated my efforts and went simple.  As I do… 😉

One day, I’ll blog about a simple, inexpensive, healthy protein bar, but until then… 😉

These are not a dessert, although, I convinced Maya they were for a few nights haha.  More like a healthy snack to tide you over 🙂Blog Quinoa Sun Butter Hemp Seed Protein Balls-1 Blog Quinoa Sun Butter Hemp Seed Protein Balls-2Ingredients (Made 34 Balls)

  • 1 Cup uncooked Quinoa
  • 6 Tablespoons Sun Butter
  • 1/4 Cup Organic Pure Maple Syrup
  • 6 Tablespoons Hemp Seeds (for rolling-btw, OBSESSED with Hemp Seeds right now!!  If you’re interested in the health benefits, read here.  Oh, and they’re yummy!)

(All these ingredients I found at Costco.  NOT in any way sponsored, but just an easy “Mama cooking for the masses” FYI ;))

Directions

  • Cook Quinoa as directed (I did mine in my rice cooker and it took me 30 seconds of prep, but about 30-45 minutes to wait :))
  • Stir in Sun Butter and Maple SyrupBlog Quinoa Sun Butter Hemp Seed Protein Balls-3 The reward of licking the measuring cup…who could deny such a thing??!!Blog Quinoa Sun Butter Hemp Seed Protein Balls-4 Blog Quinoa Sun Butter Hemp Seed Protein Balls-5 Blog Quinoa Sun Butter Hemp Seed Protein Balls-6
  • Take 1 Tablespoon amounts and form into balls
  • Roll the balls in hemp seeds.Blog Quinoa Sun Butter Hemp Seed Protein Balls-7
  • Refrigerate for an hour in a air tight container and store for future snacking 🙂

ENJOY!

dit-elle-Lauren

Winter Greens Casserole Made Easy

I LOVE winter greens and if you’re wondering what winter greens are think chard (rainbow or swiss) or kale or those types of leafy greens. So I read this recipe that took sausage, onions, winter greens and sautéed it all.. and then you put it in a casserole dish and poured cream all over it and topped it with cheese. While that was super delicious, but WAY too rich and a few steps too many, I simplified the recipe with the option (of course! :)) of adding cream and cheese or not!

winter greens and sausage blog (2) winter greens and sausage blog (1)

Ingredients

  • 1 tablespoon butter, plus extra for dish
  • 2 shallots, sliced
  • 3 cloves garlic, minced
  • 1 pound bulk Italian sausage (or pre-cooked sausages like roasted red pepper turkey, feta and spinach, etc.. there’s a great selection out there and if you get something pre-cooked you are also saving some cooking time)
  • 3 pounds braising greens (kale, mustard, chard, collard, etc.), tough stems removed and leaves, cut into small pieces
  • 1/8 teaspoon freshly grated nutmeg (optional)
  • Red chili flakes (optional)
  • Salt and pepper, to taste

Additional optional steps for Baked Casserole version

  • 1/2 cup chicken stock (optional, see below)
  • 1 cup heavy cream (optional, see below)
  • 1 cup grated Gruyere cheese (I used Parmesan)

Preparation

  • In a skillet, melt butter and add shallots and garlic and cook for a few minutes until fragrant but not starting to brown
  • Stir in sausage and cook, breaking into small pieces, until cooked through, about 10 minutes. Drain off fat, if desired.
  • Add braising greens, in batches, stirring until cooked down. When all greens have been added, cook and stir for 5 minutes; season with nutmeg, salt and pepper and red chili flakes.
  • This is where I stop and serve with freshly grated Parmesan! Voila! Finished!
  • But if you want to get fancy, add chicken stock and cook 5 additional minutes. Transfer greens to the prepared dish. Drizzle with cream and sprinkle with cheese. Bake until cream is bubbling and cheese is golden, 20 to 30 minutes.


Thanks PCC Natural Markets for this one!

dit-elle-Esther


Faux Fur + Clogs…on the beach? WHY NOT!?

 Ok, I’ll admit.  This outfit might seem a bit out there.  I was rummaging through my closet looking for something, and came upon this jacket that I thrifted about 2 years ago for…$3.50!!!!  I mean, what the what!?!  WHY don’t I wear this more often?  It’s not only fun, but it’s ridiculously warm.  Almost too much so on this day.  And, it just adds such a fun element to a fairly simple outfit.  Oh, and I got a compliment on it from a pretty hip mom while we were playing, so…there’s that! 🙂

All that to say.  I keep forgetting about this jacket/thinking it’s too dressy and out there for me to wear more often, but then…why not?!!  Why don’t we wear things that make us feel fun more often?  I’ll be honest.  I felt too self conscious to wear it to pre-school pick up, but WHY???  I think I might get my nerve up to do it later…maybe. 🙂  Life’s too short not to wear things that we WANT to wear because we are afraid of what other’s might think!Blog Vintage Faux Fur Jacket DL1961 Harper Sven Red Lacy Clogs-1 
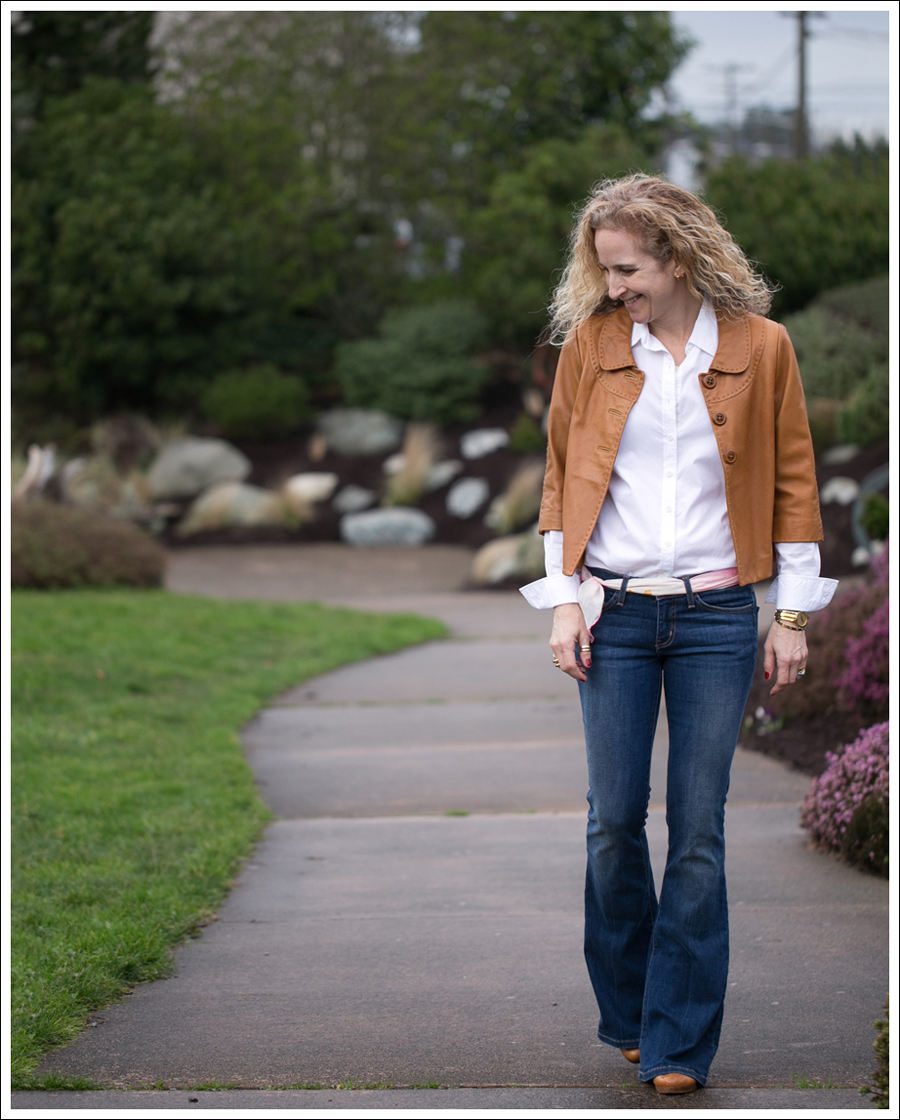
Ok…AND these jeans are actually from my favorite denim maker DL1961.  Their 4 way stretch is any mama’s dream.  Ok, it’s anyone’s dream.  I’m wearing them in almost half my posts!  They were having a ridiculous sale (extra 25% off sale price!), so I thought I’d introduce the Huz to a pair.  Then…realized that Maya was outgrowing the pairs that she has, so…I bought a new size up for her.  THEN, I realized that I could save $10 in shipping if I bought something else (am I the only one that does this??).  Um…SOOOOO I took a chance and bought a pair of size 16 girls jeans for a steal.  I’ve bought a few kids jeans from thrift stores in the past, and LOVED THEM!!!  In my experience size 14-16 usually equals a 26-27 in women’s sizes, yet they are a FRACTION of the cost.  Oh, and they are usually a higher rise, and a lower inseam (my legs are ridiculously short for my frame!)  All that is a win for me!  And, for anyone who is a size 27 or below!  ESPECIALLY for those that are petite!  I feel like they have to get so frustrated, and can only hope that most have thought to shop in the girls section without being embarrassed!!  I say shop wherever you can find things that fit and make you feel good! Blog Vintage Faux Fur Jacket DL1961 Harper Sven Red Lacy Clogs-2And then, she was off…. 🙂 Blog Vintage Faux Fur Jacket DL1961 Harper Sven Red Lacy Clogs-3Blog Gap Faux Fur Vest Tea Collection Tango Tiered DL1961 Harper Kamik Snow Boots-1 Blog Gap Faux Fur Vest Tea Collection Tango Tiered DL1961 Harper Kamik Snow Boots-2 Blog Gap Faux Fur Vest Tea Collection Tango Tiered DL1961 Harper Kamik Snow Boots-3 Blog Gap Faux Fur Vest Tea Collection Tango Tiered DL1961 Harper Kamik Snow Boots-4We’ve been so lucky getting blue sky breaks lately!! Blog Gap Faux Fur Vest Tea Collection Tango Tiered DL1961 Harper Kamik Snow Boots-5 Blog Gap Faux Fur Vest Tea Collection Tango Tiered DL1961 Harper Kamik Snow Boots-6 Blog Gap Faux Fur Vest Tea Collection Tango Tiered DL1961 Harper Kamik Snow Boots-7

On me…

Jacket- Vintage (thrifted)
Top- Zara (old)
On Maya…
Vest- GapKids (thrifted)
Dress- Tea Collection (thrifted, similar here)
Boots- Kamik (thrifted, but similar here)
Keeping it Real…
Ok, so I really didn’t know where we were going when we headed out.  It had been raining early on in the day, but then got somewhat sunny after Maya got out from school.  Honestly living near the beach, you never know what you are going to get.  It can be one way up above a few blocks, and then you never know what the tide or wind will be like once you get down there!  I knew that I didn’t want to go to a sandy beach, but thought we’d go to the far end of the beach which has really wide concrete paths  you can walk along.  I thought I’d let Maya jump in mud puddles for fun.  And then…we saw that the tide was out, and it was all over.  She was off and running for the stairs down the beach in a nano second!  Thankfully these clogs have a bendable base, are easly to walk in even on rocks, and are ridiculously comfortable.  BUT…I looked like a clase A freak, so…whatever. 😉 Thankfully, it was still pretty cold and not many people go to this end of the beach.  No judgement, except from the hip mom who liked my jacket 😉Blog Outtake
(all pictures taken with a self timer and tripod, except ones of Maya :))

dit-elle-Lauren