Tag Archives: comfort food

Blackberry Lemon Pudding Cakes

I made Lemon Pudding Cakes for dessert on Easter, and they were DELICIOUS!!

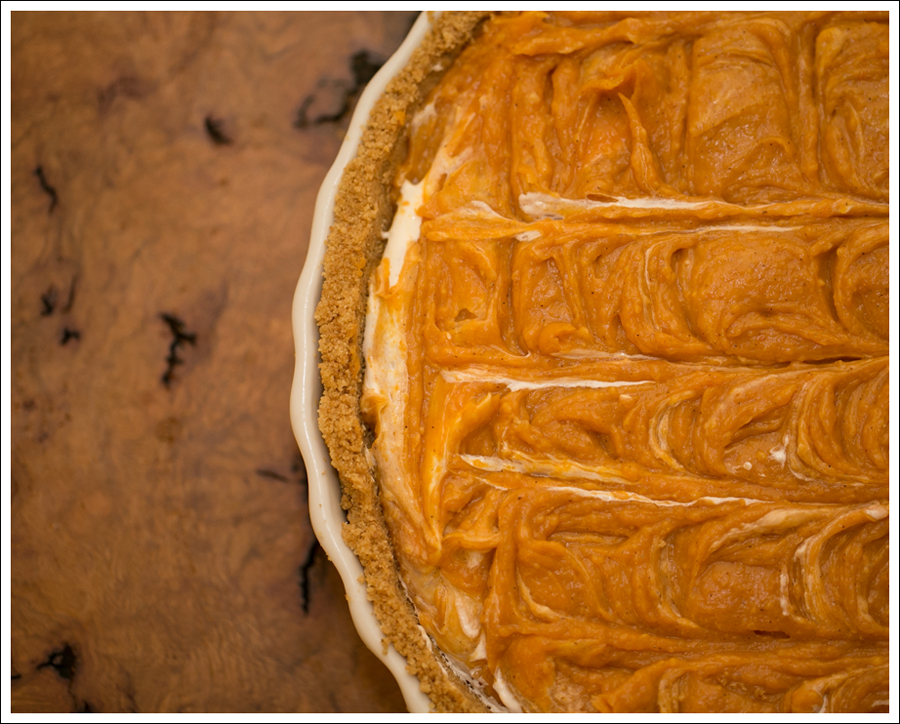
SO…I decided to make them again the other night when we had some friends over.  I shook it up a little and incorporate some blackberries that Maya and I picked earlier that day.Blog Blackberry lemon pudding cakes-1 Blog Blackberry lemon pudding cakes-2 Blog Blackberry lemon pudding cakes-3

What you need…

  • 3/4 Cup Granulated Sugar
  • 1/3 Cup All-Purpose Flour
  • large eggs (separated)
  • 2 Tablespoons Unsalted Butter (room temp)
  • 1 Cup Whole Milk
  • 1 Teaspoon Finely Grated Lemon Zest
  • 1/3 Cup Fresh Lemon Juice and Blackberry Juice ( just strained a handful of berries and then filled the rest of the 1/3 Cup with lemon juice 🙂
  • 1/2 Teaspoon Kosher Salt
  • 3 Teaspoons Turbinado or Some Other Coarse Sugar

What to do…

  • Heat oven to 350° F.
  • Place six 4-ounce ramekins into a 9×13 Pyrex dish.
  • In a medium bowl, whisk together the granulated sugar and flour; set aside.
  • In a second medium bowl, whisk together the egg yolks and butter until combined.
  • Whisk in the milk and lemon zest and juice. Add the lemon mixture to the sugar mixture and whisk until smooth.
  • Using an electric mixer, beat the egg whites and salt on medium-high until stiff peaks form, 2 to 3 minutes.
  • In 3 additions, gently fold the egg whites into the lemon-sugar mixture.
  • Divide the pudding mixture among the ramekins (about 3/4 of a cup each). Dividing evenly, sprinkle with the turbinado sugar.
  • Refrigerate for a couple of hours if you have the time.
  • To the roasting pan, add just enough hot water to reach halfway up the sides of the ramekins.
  • Bake until the tops are golden brown.  I accidentally undercooked mine at 35 minutes, and honestly the general consensus was that was a happy accident.  Original recipe says to cook for 40-45.
  • Take out of the pan and let cool on a rack.
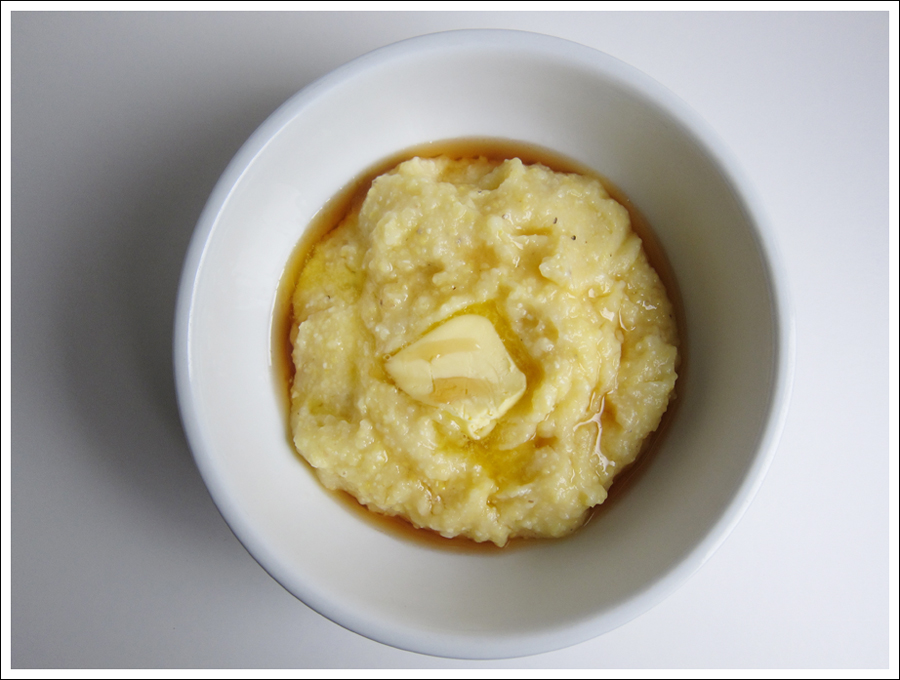
  • Here’s what I would do again, but didn’t have time to do this time, which is why the pudding and cake aren’t as separately defined.  I refrigerated the cakes for a few hours before cooking and the pudding was creamy and the top cake was solid but moist.  Also, you can eat them right away, and it will be more like a lemon molten cake.  To each his own, but cold lemon sounded better to me. 🙂
  • Can make one large cake (probably best in an 8×8 pan).  If you do that cook for 30-35 minutes.

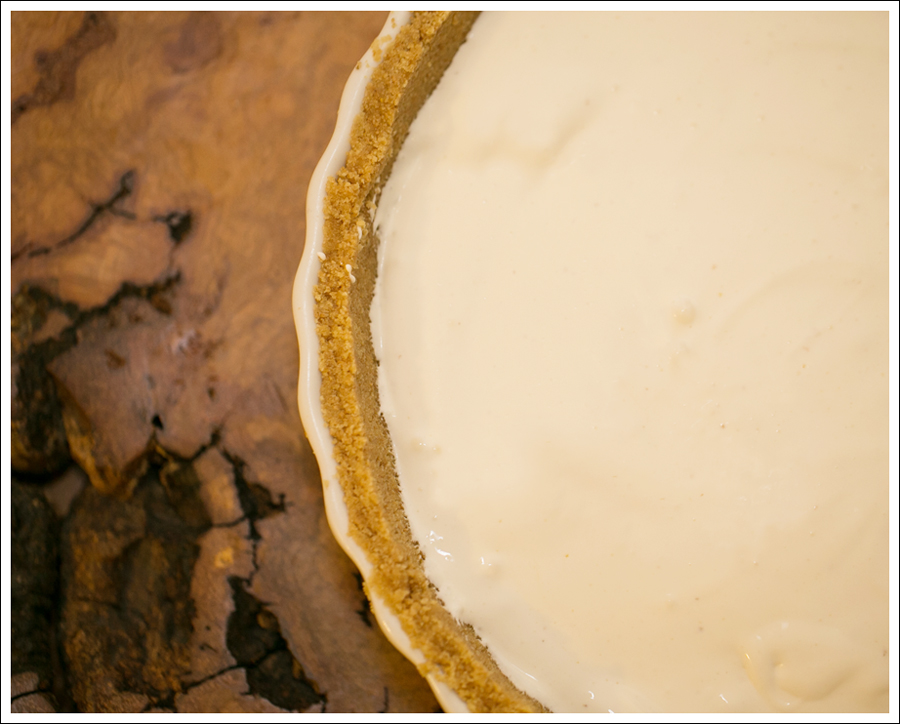
For reference, here’s what the original lemon cakes looked like that I refrigerated for a few hours before baking.  A definite distinction between the pudding and the cake.  Blog Real Simple Lemon Pudding Cakes-3Either way…still so good!

Enjoy!!  We did! 🙂dit-elle-Lauren

Creamed Corn with Bacon and Leeks

Nothing says comfort food like Creamed Corn with Bacon and Leeks. Corn is starting to come into season now, and hopefully you can find it fresh and sweet and serve steamed – as is – or with a little salt and butter! This is a fantastic recipe for leftover steamed corn. Cut kernels off the cob and cook with some milk, leeks and bacon. Delish!

creamed corn with bacon and leeks blog

Ingredients

  • 6 ears corn
  • 2 cups milk
  • 1 chopped leek
  • 4 slices bacon
  • Salt/pepper to taste

Directions

  • Cut kernels from ears of corn to measure 3 cups
  • Using the dull side of knife blade, scrape milk and remaining pulp from cobs into a bowl
  • Place 1 1/2 cups kernels, milk, salt and pepper in a food processor, process until smooth
  • Cook bacon in large cast-iron skillet over medium heat until crisp, turning once
  • Remove bacon from pan, reserving 1 teaspoon drippings in pan; crumble bacon
  • Add leek to pan and cook 2 minutes or until tender, stirring constantly
  • Add pureed corn mixture, remaining 1 1/2 cups corn kernels, and bring to boil
  • Reduce heat and simmer for 3 minutes or until slightly thick
  • Sprinkle with the crumbled bacon just before serving

Enjoy! 🙂

dit-elle-Esther

Healthy Black Bean Chicken Enchiladas | (can be made gluten, dairy, and soy free)

Chicken enchiladas are pretty simple to make.  There are a bunch of different things you can throw in there, and let’s be honest…if it’s drenched in yummy sauce you can’t go wrong. 🙂

When Maya was 5 weeks old, she was diagnosed with a dairy and soy allergy.  Since I was breastfeeding…that meant no dairy or soy for me either :(.  Dairy isn’t so hard, but finding things that don’t have soy is REALLY HARD.  Making dinners was really hard (wait did I say that already?).  I had to get creative.  Did I mention I have two hungry teenage stepsons?  SO…I made this recipe just thinking of things that would taste good that didn’t have dairy and soy.

Maya is still what I’d call “dairy intollerant” (she gets really congested), but we have a little bit here and there and she does ok.  The entire recipe only has 1 cup of cottage cheese, and 1/2 a cup of shredded cheese.  Adds the perfect amount of creaminess to the enchiladas and a hint of cheese on top.

They are packed with low fat protein and taste delicious!  Blog Gluten Free Healthy Black Bean Chicken Enchiladas-1 Blog Healthy Black Bean Chicken Enchiladas-7

Ingredients

  • Bag of Tortillas.  I love these, and you could easily sub in any gluten free options.
  • 7-8 chicken breasts (depending on size)  Basically each enchilada has almost a full chicken breast!
  • Large jar or can of enchilada sauce.  I go back and forth between red and green.
  • Small yellow onion
  • Jar of diced chiles (they aren’t that spicy if you’re worried and add a great flavor and moisture to the mix)
  • Can of refried beans (I like to use black bean, but use whatever!)
  • 1 C low fat Cottage Cheese (I love the one that has Chive in it!) don’t use for dairy free
  • 1/2 C Shredded cheese don’t use for dairy free
  • 2 TBL of Olive Oil

Directions

  • Start boiling your water for the chicken.  I have NO idea why I boil the chicken!  I saw a friend do it once, and then have done it ever since when making enchiladas!  It’s easier, doesn’t have any added fat from cooking it with oil, and it requires less attention-WIN.
  • Add chicken and cook for 10-12 minutes (until they rise to the top)  They will cook more in the enchiladas, so you want to make sure you don’t overcook them.
  • Put olive oil large a non stick pan.  Add onions and stir for about 5 min (or until they start to get soft).
  • Once chicken is cooked, let it sit on a cutting board/plate/bowl.  You will want it to cool before you shred it (I’ve burned my fingers WAY too many times)  Oh, and note-if you have a dog…don’t let the chicken sit out on the counter.  Do I need to tell you what happened when I did that?? 😦
  • Dump refried beans, chilis, cottage cheese (opt out for dairy free)  into the pan with the onions.  You can add a little bit of your enchilada sauce to the mixture if you aren’t using the cottage cheese to make it a little moister.  Start finger shredding the chicken into this mixture and stir.  (or do it all in a big bowl)  Maya loved helping stir it all together!
  • Pour about 1/4 C of enchilada sauce into a 9×13 pan, so they don’t stick.
  • Scoop about a cup of mixture into each tortilla, roll and place (seam side down) into 9×13 pan.  Repeat until all tortillas are filled or you run out of mixture.
  • Pour the rest of the enchilada sauce over the rolled tortillas and add cheese on top (opt out for dairy free)
  • Bake at 350 for 20.  Garnish with avocado, some plain Greek Yogurt, salsa (or all three!)

Keeping it real…

I actually first wrote this post 2 and a half years ago, but hated the picture I took.  The kids were hangry haha.  SO, I never posted it.  I was super excited to find it in the archives after making it again for dinner on Monday!  This time I snapped a few slightly better rushed picture before we ate (oh, to have TIME!!), and had the post all ready to go-WIN!!

Here’s the first picture from 2.5 years ago with green sauce… 🙂Blog Healthy Chicken Enchiladas-9Enjoy!!

dit-elle-Lauren

Lemon Pudding Cakes

We made these for dessert on Easter, and they were SO GOOD!!!  While I wouldn’t call these necessarily healthy, they really were surprisingly light and refreshing!  The flavor was amazing too!

I acctually tore this recipe from my Real Simple magazine back in April of 2012.  Yes…I still collect and keep magazine tear outs (even in this Pinterest driven day!!)  I didn’t deviate from the original recipe with the exception of accidentally undercooking them-which I will do again when I make them next time.  It was a huge hit.Blog Real Simple Lemon Pudding Cakes-1 Blog Real Simple Lemon Pudding Cakes-2
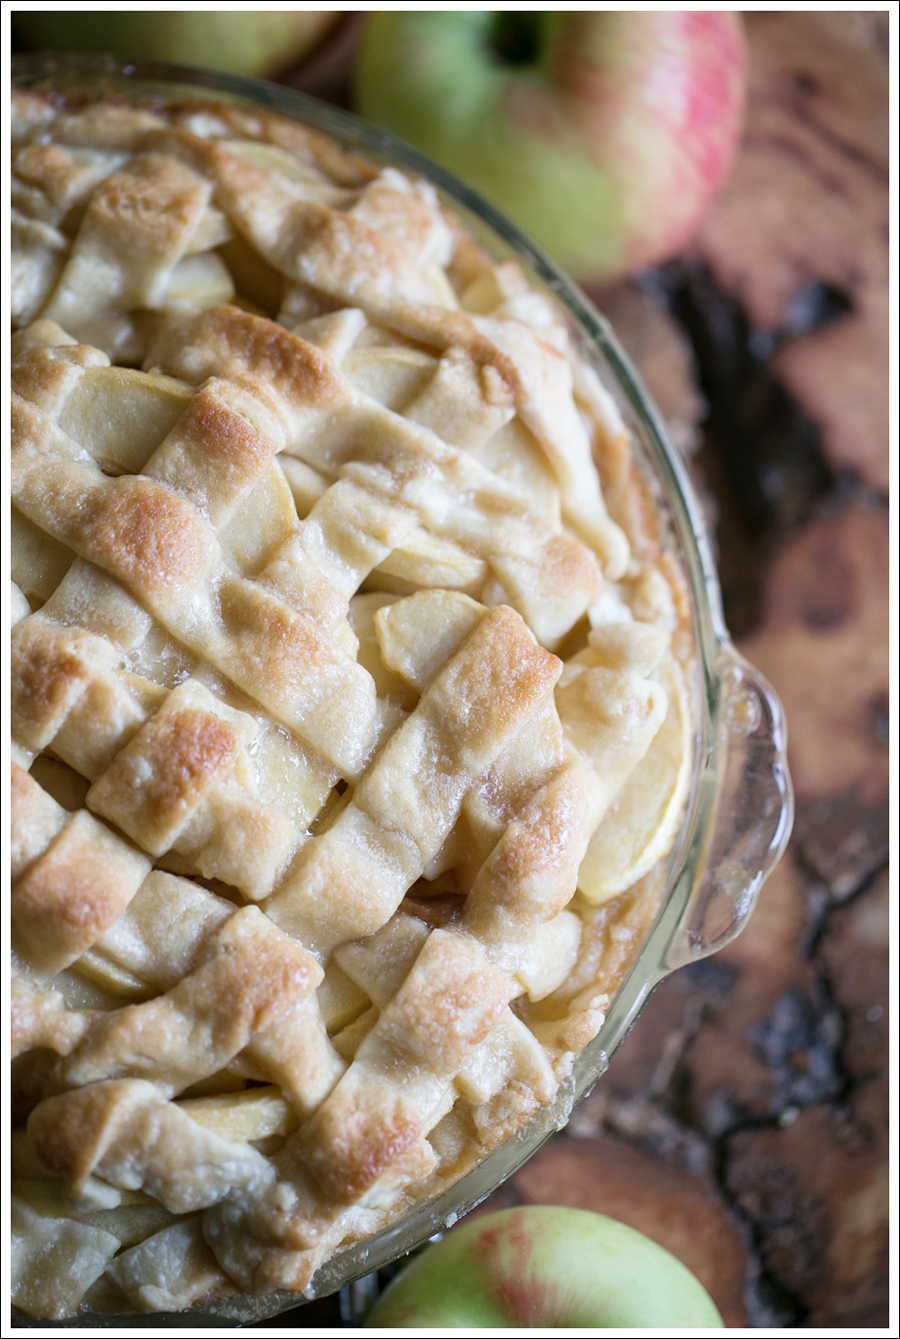
If this next image doesn’t make your mouth water, I don’t know what will!  And those cute little fingers?  Maya was such a good assistant! Blog Real Simple Lemon Pudding Cakes-3

What you need…

  • 3/4 Cup Granulated Sugar
  • 1/3 Cup All-Purpose Flour
  • large eggs (separated)
  • 2 Tablespoons Unsalted Butter (room temp)
  • 1 Cup Whole Milk
  • 1 Teaspoon Finely Grated Lemon Zest
  • 1/3 Cup Fresh Lemon Juice
  • 1/2 Teaspoon Kosher Salt
  • 3 Teaspoons Turbinado or Some Other Coarse Sugar

What to do…

  • Heat oven to 350° F.
  • Place six 4-ounce ramekins into a 9×13 Pyrex dish.
  • In a medium bowl, whisk together the granulated sugar and flour; set aside.
  • In a second medium bowl, whisk together the egg yolks and butter until combined.
  • Whisk in the milk and lemon zest and juice. Add the lemon mixture to the sugar mixture and whisk until smooth.
  • Using an electric mixer, beat the egg whites and salt on medium-high until stiff peaks form, 2 to 3 minutes.
  • In 3 additions, gently fold the egg whites into the lemon-sugar mixture.
  • Divide the pudding mixture among the ramekins (about 3/4 of a cup each). Dividing evenly, sprinkle with the turbinado sugar.Blog Real Simple Lemon Pudding Cakes-4
  • I chose to refrigerate mine for a few hours, but you don’t have to.  If you do, the batter will separate, like above, and the end result will be that creamy pudding at the base, and light fluffy cake on top.  If you don’t have time, the separation will be less noticeable, but still delicious!!  Seen in a slightly different variation when I had less time here. 🙂
  • To the roasting pan, add just enough hot water to reach halfway up the sides of the ramekins.
  • Bake until the tops are golden brown.  I accidentally undercooked mine at 35 minutes, and honestly the general consensus was that was a happy accident.  Original recipe says to cook for 40-45.
  • Take out of the pan and let cool on a rack.Blog Real Simple Lemon Pudding Cakes-5
  • I refrigerated mine for a few hours after cooking and the pudding was firm and the top cake was moist.  You can eat them right away, and it will be more like a lemon molten cake.  To each his own, but cold lemon sounded better to me. 🙂
  • Can make one large cake (probably best in an 8×8 pan).  If you do that cook for 30-35 minutes.

You can find the original recipe here.

Enjoy!!  We did! 🙂Blog Real Simple Lemon Pudding Cakes-6dit-elle-Lauren

Hasty Pudding

My daughter Ava and I have been reading Little House in the Big Woods and Little House on the Prairie. She LOVES the books, her first real “big girl chapter books” and loves hearing about the stories from that time that seems so long ago. We talk about the Ingalls family, and the Spartan living compared to our life today.  “Can we give Laura some of my toys?” asked Ava. Melt my heart!

In one of the chapters, Ma made Hasty Pudding. There are a bunch of recipes online and I’m sure there are many variations, but in the book they described it as a cornmeal porridge with some maple syrup and butter. So that’s what we made! Super fun kid experience to watch and learn and super yummy! 🙂

hasty pudding blog (2) hasty pudding blog (1)

Ingredients

  • Cornmeal
  • Water
  • Butter
  • Maple syrup

Directions

  • Corn meal package should have instructions for quantities and cook times. I usually make a larger batch, about 1 cup cornmeal + half a large pot of water. I realize that’s not very helpful, but it’s one of those things you’ll need to check based on how finely ground your cornmeal is.
  • You can adjust water to make it thicker or thinner
  • Serve with butter and some maple syrup
  • Enjoy! 🙂

dit-elle-Esther

Mashed Potatoes

What says comfort food like hot mashed potatoes with very simply some melted butter, salt and pepper..! Mashed potatoes are incredibly easy to make. And you can do so much with them. Mix in some fresh or roasted garlic, sour crème or milk, finely chopped chives or green onions, bacon bits and cheddar cheese. The combinations are endless! The secret to good mashed potatoes however is simple.. it lies in the quality and type of potatoes. I’ve found red potatoes and gold potatoes to be excellent options for mashed potatoes.

Blog mashedpotatoes

Ingredients

  • 2 lbs potatoes
  • dash of salt
  • Butter and/or other favorite toppings

Directions

  • Peel potatoes (if desired), chop in 1″ pieces
  • Cover potatoes with water in pot and bring to boil
  • Cook until knife inserts in a potato easily
  • Pour off water and let cool a bit
  • Use an inversion blender to mix, adding butter and other toppings as desired

dit-elle-Esther

Grandma Ople’s Apple Pie // aka Best Apple Pie Ever!

I want to preface this by saying it’s not my Grandma Ople’s Apple Pie.  I don’t have a Grandma Ople, but just the name alone should tell you how good it is!  I originally found this recipe 7-8 years ago, and I’ve never looked for another apple pie recipe since!

I always make it over the holidays (only just now getting around to blogging it!), and it’s always one of the pies that disappears the quickest!  Well, it’s usually a tie between this one and the Pumpkin Layer Pie.  We usually have 6+ pies or…about 1/2 a pie for each family member in attendance haha.

Blog Grandma Oples Apple Pie-1Ingredients

  • 1 recipe pastry for a 9 inch double crust pie (pre-marriage and kids, I made my own, but I cheat now and buy store bought.  Nobody complains, and then I have time to do lattice!)
  • 1/2 cup unsalted butter
  • 3 tablespoons all-purpose flour
  • 1/2 cup white sugar
  • 1/2 cup packed brown sugar
  • 1/4 cup water
  • 8 Granny Smith Apples (cut, peeled, and sliced)  I used Honeycrisp this last time, because that’s what I had, and it was a mistake.  It was too watery 😦  BUT…every time I’ve used the Granny Smith apples it’s been perfect.  And it sounds like a lot, but it’s a mountain of yumminess!!!

Directions

  1. Peel and then cut all your apples.  I usually do them in 1/2 inch slices.
  2. Melt butter in a sauce pan. Stir in flour to form a paste. Add white sugar, brown sugar and water; bring to a boil. Reduce temperature, and simmer 5 minutes.
  3. Meanwhile, place the bottom crust in your pan. Fill with apples, mounded slightly. Cover with a lattice work crust. Lattice isn’t as hard as it looks.  I just cut mine in to strips and then started layering here and there.  It doesn’t have to be perfect!
  4. Gently pour the sugar and butter liquid over the crust. Pour slowly so that it does not run off.  A lot of reviews said to just mix the apples in with the mixture, but don’t!  It makes this golden crispy sweet glaze on the top that is one of the best parts!
  5. Bake 15 minutes at 425 degrees F (220 degrees C). Reduce the temperature to 350 degrees F (175 degrees C), and continue baking for 35 to 45 minutes.

Enjoy!!!dit-elle-Lauren

Shepherd’s Pie

This is some serious comfort food – perfect for this dreary January weather – juicy ground beef and spices are tossed with vegetables and topped with golden and buttery mashed potatoes! 🙂

Blog shepheards pie

Ingredients

  • 2 pounds Yukon gold potatoes, peeled and cut into chunks
  • 4 tablespoons unsalted butter
  • 1/2 cup milk
  • Salt and pepper, to taste
  • 2 teaspoons olive oil
  • 1 onion, finely chopped
  • 3 carrots, finely chopped
  • 3 cloves garlic, minced
  • 1 pound ground beef
  • 1 tablespoon tomato paste
  • 1/2 cup frozen peas, thawed
  • 1/4 cup chopped fresh parsley

Preparation

  • Preheat oven to 375° F.
  • Bring a large pot of salted water to a boil. Add potatoes and cook until tender, about 20 minutes. Drain; run through a food mill, ricer or mash. Stir in butter and milk; season with salt and pepper. Keep warm.
  • Heat oil in a skillet over medium heat. Add onions, carrots and garlic; cook, until soft, about 7 minutes. Add ground beef and cook until no longer pink, 8 to 10 minutes. Drain the fat.
  • Stir in tomato paste, peas, and parsley; season with salt and pepper.
  • Transfer meat mixture to an ovenproof dish. Spread potatoes over the top and crosshatch with a fork. Bake until golden, 30 to 35 minutes.

Super Mom Tip: Make days to weeks in advance and freeze! When ready, defrost in fridge overnight and bake per directions above.

Thanks to PCC Natural Markets and note that this recipe has been modified from the original.

dit-elle-Esther

Pumpkin Layer Pie

Pumpkin Pie used to be the main thing I loved about Thanksgiving dinner (foodwise that is ;)), until I found this recipe about 15 years ago.  I’ve never had a piece of regular pumpkin pie since.  I’ve tried a bite here and there, just to see, but this pie is SO much better that I don’t think I’ll ever go back.  I’ve modified it over the years from the original recipe.  I never could get a consistent texture, until I tweaked a few things.  In the original recipe the cream cheese layer is about 1/3 to 2/3’s pumpkin.  I evened it out a bit, because pumpkin layer would tend to not set (the biggest complaint in all the reviews).  It’s still delicious as a soupy pie haha, but I like it better with the below modifications.Blog Pumpkin Layer Pie-1Ingredients

For the Crust…
I am a BIG graham cracker crust fan.  I have been known to double a recipe both for this or when I make cheesecake haha.  So, this is a bit thick, but so yummy!!
  • 2 packets of graham crackers
  • 1 1\2 sticks of butter (3/4 cup) (melted)

Crush graham crackers (either in a food processor or in a large zip lock bag with a rolling pin).  Pour butter over graham crackers and mix until you can form it into your pie pan.Blog Pumpkin Layer Pie-2 For the bottom layer…

  • 8 ounces cream cheese, softened (I use light, but wouldn’t use non fat-too soft)
  • 1 tablespoon white sugar
  • 1 1/2 cups frozen whipped topping, thawed (you could probably use real whip cream if you’re a purist ;).  I happen to LOVE Cool Whip-total guilty pleasure!)
  • 1 Tablespoon Milk

In a large bowl, whisk together cream cheese, 1 tablespoon of milk, and sugar until smooth. Gently stir in whipped topping. Spread into bottom of crust.Blog Pumpkin Layer Pie-3For the Pumpkin Layer

  • 2  packages of 3.4 oz instant vanilla pudding mix
  • 1 Can (15 oz) of pumpkin puree.
  • 1 Cup Cold Milk
  • 1 teaspoon pumpkin Pie Spice (I go a lot lighter on the spice, because it tasted to overwhelming to me)  You could also use a mix of cinnamon, ginger, and cloves.

Pour pumpkin puree and a cup of milk into large bowl, and thoroughly mix in pudding mix, and spices. When thickened, spread over cream cheese layer.  I knifed across the layers to make a marble pattern 🙂Blog Pumpkin Layer Pie-4Refrigerate for 4 hours, or until set.  I usually make it the night before…

Enjoy!!dit-elle-Lauren

Polenta Torte

Like gorgonzola? Then you will love this dish! Don’t like it? Then simply omit and stick with the parmesan cheese. This is a wonderful polenta & greens dish, spiced with some hot chili flakes and pepper and topped with cheese. Not really a kid dish, given the spice, but you could make a dish of plain polenta and top with cheese – a favorite in our house!

Blog polenta torte with greens

Ingredients

  • 4 c lukewarm water
  • 1 c stone-ground coarse cornmeal
  • salt to taste
  • 1-2 lbs mixed tender greens (spinach, kale, arugula)
  • 3 Tsp olive oil
  • 1/4 tsp crushed red pepper flakes
  • ground black pepper
  • 1 garlic clove
  • 1/2 c grated pecorino cheese (like parmesan)
  • Crumbled gorgonzola

Directions

  • Heat olive oil and add pepper flakes, ground pepper and garlic – sauté until fragrant but don’t let the garlic brown or it will turn bitter
  • Pour half of the oil in a large glass baking dish
  • Add water & cornmeal & salt and bake, uncovered, for ~50 minutes
  • Add greens to skillet with leftover oil and cook for 10 minutes (covered) stirring frequently, removing lid at end and raising heat a bit to just evaporate any liquid left
  • Remove baked polenta from oven and with a spatula, scrape off the top 1/2 layer of polenta, set aside
  • Add cooked greens to the baking dish with polenta, sprinkle gorgonzola and half of the parmesan, and then cover with the rest of the polenta
  • Top with parmesan and return to oven for 10-15 minutes
  • Serve warm!

dit-elle-Esther